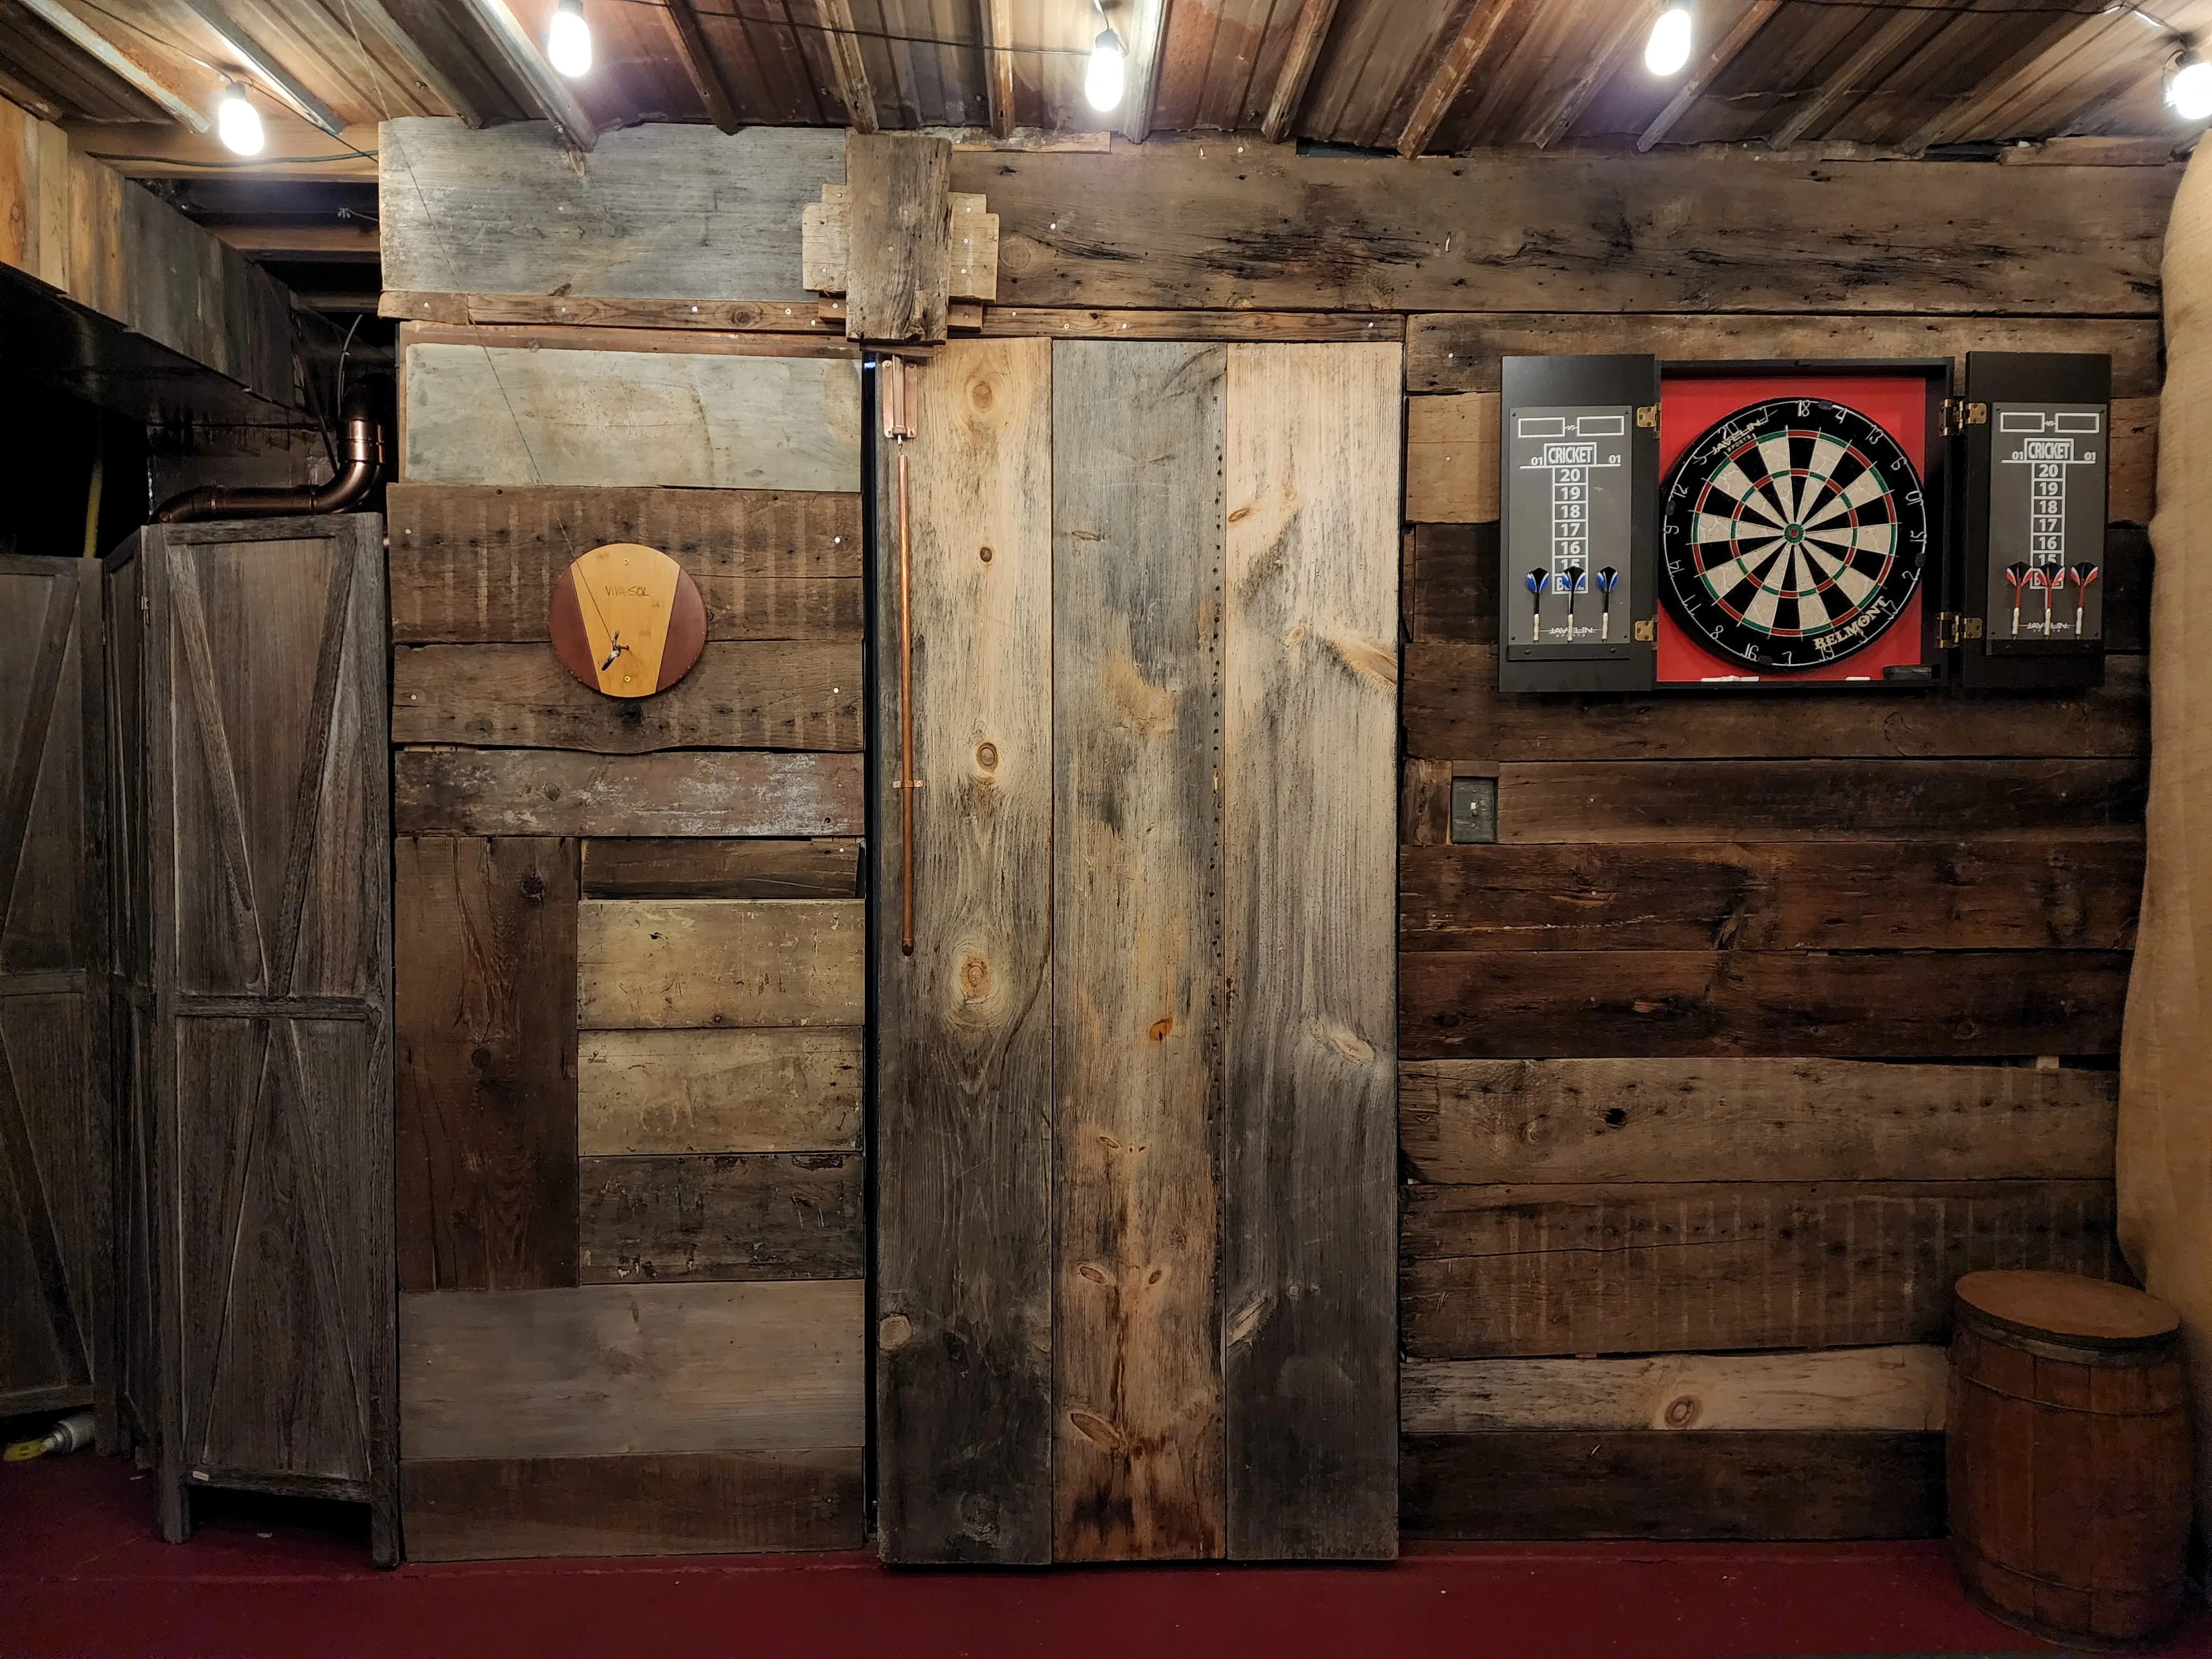
DIY Weathered Wood – Colored and unique
How to give new wood a weathered look
I am going to show you how a lonely old can of chalkboard paint teamed up with a shunned stone texture spray paint to make beautiful patina.
Sorry team, this DIY project will give you yet another reason to hold on to things that you might have considered throwing away. I’m looking at you Mr. “those 20 crusty sanding pads still have life left in them.” This weathered wood effect is one of my favorite new skills and saving up those scraps may just come in handy to make some weathered looking wood.
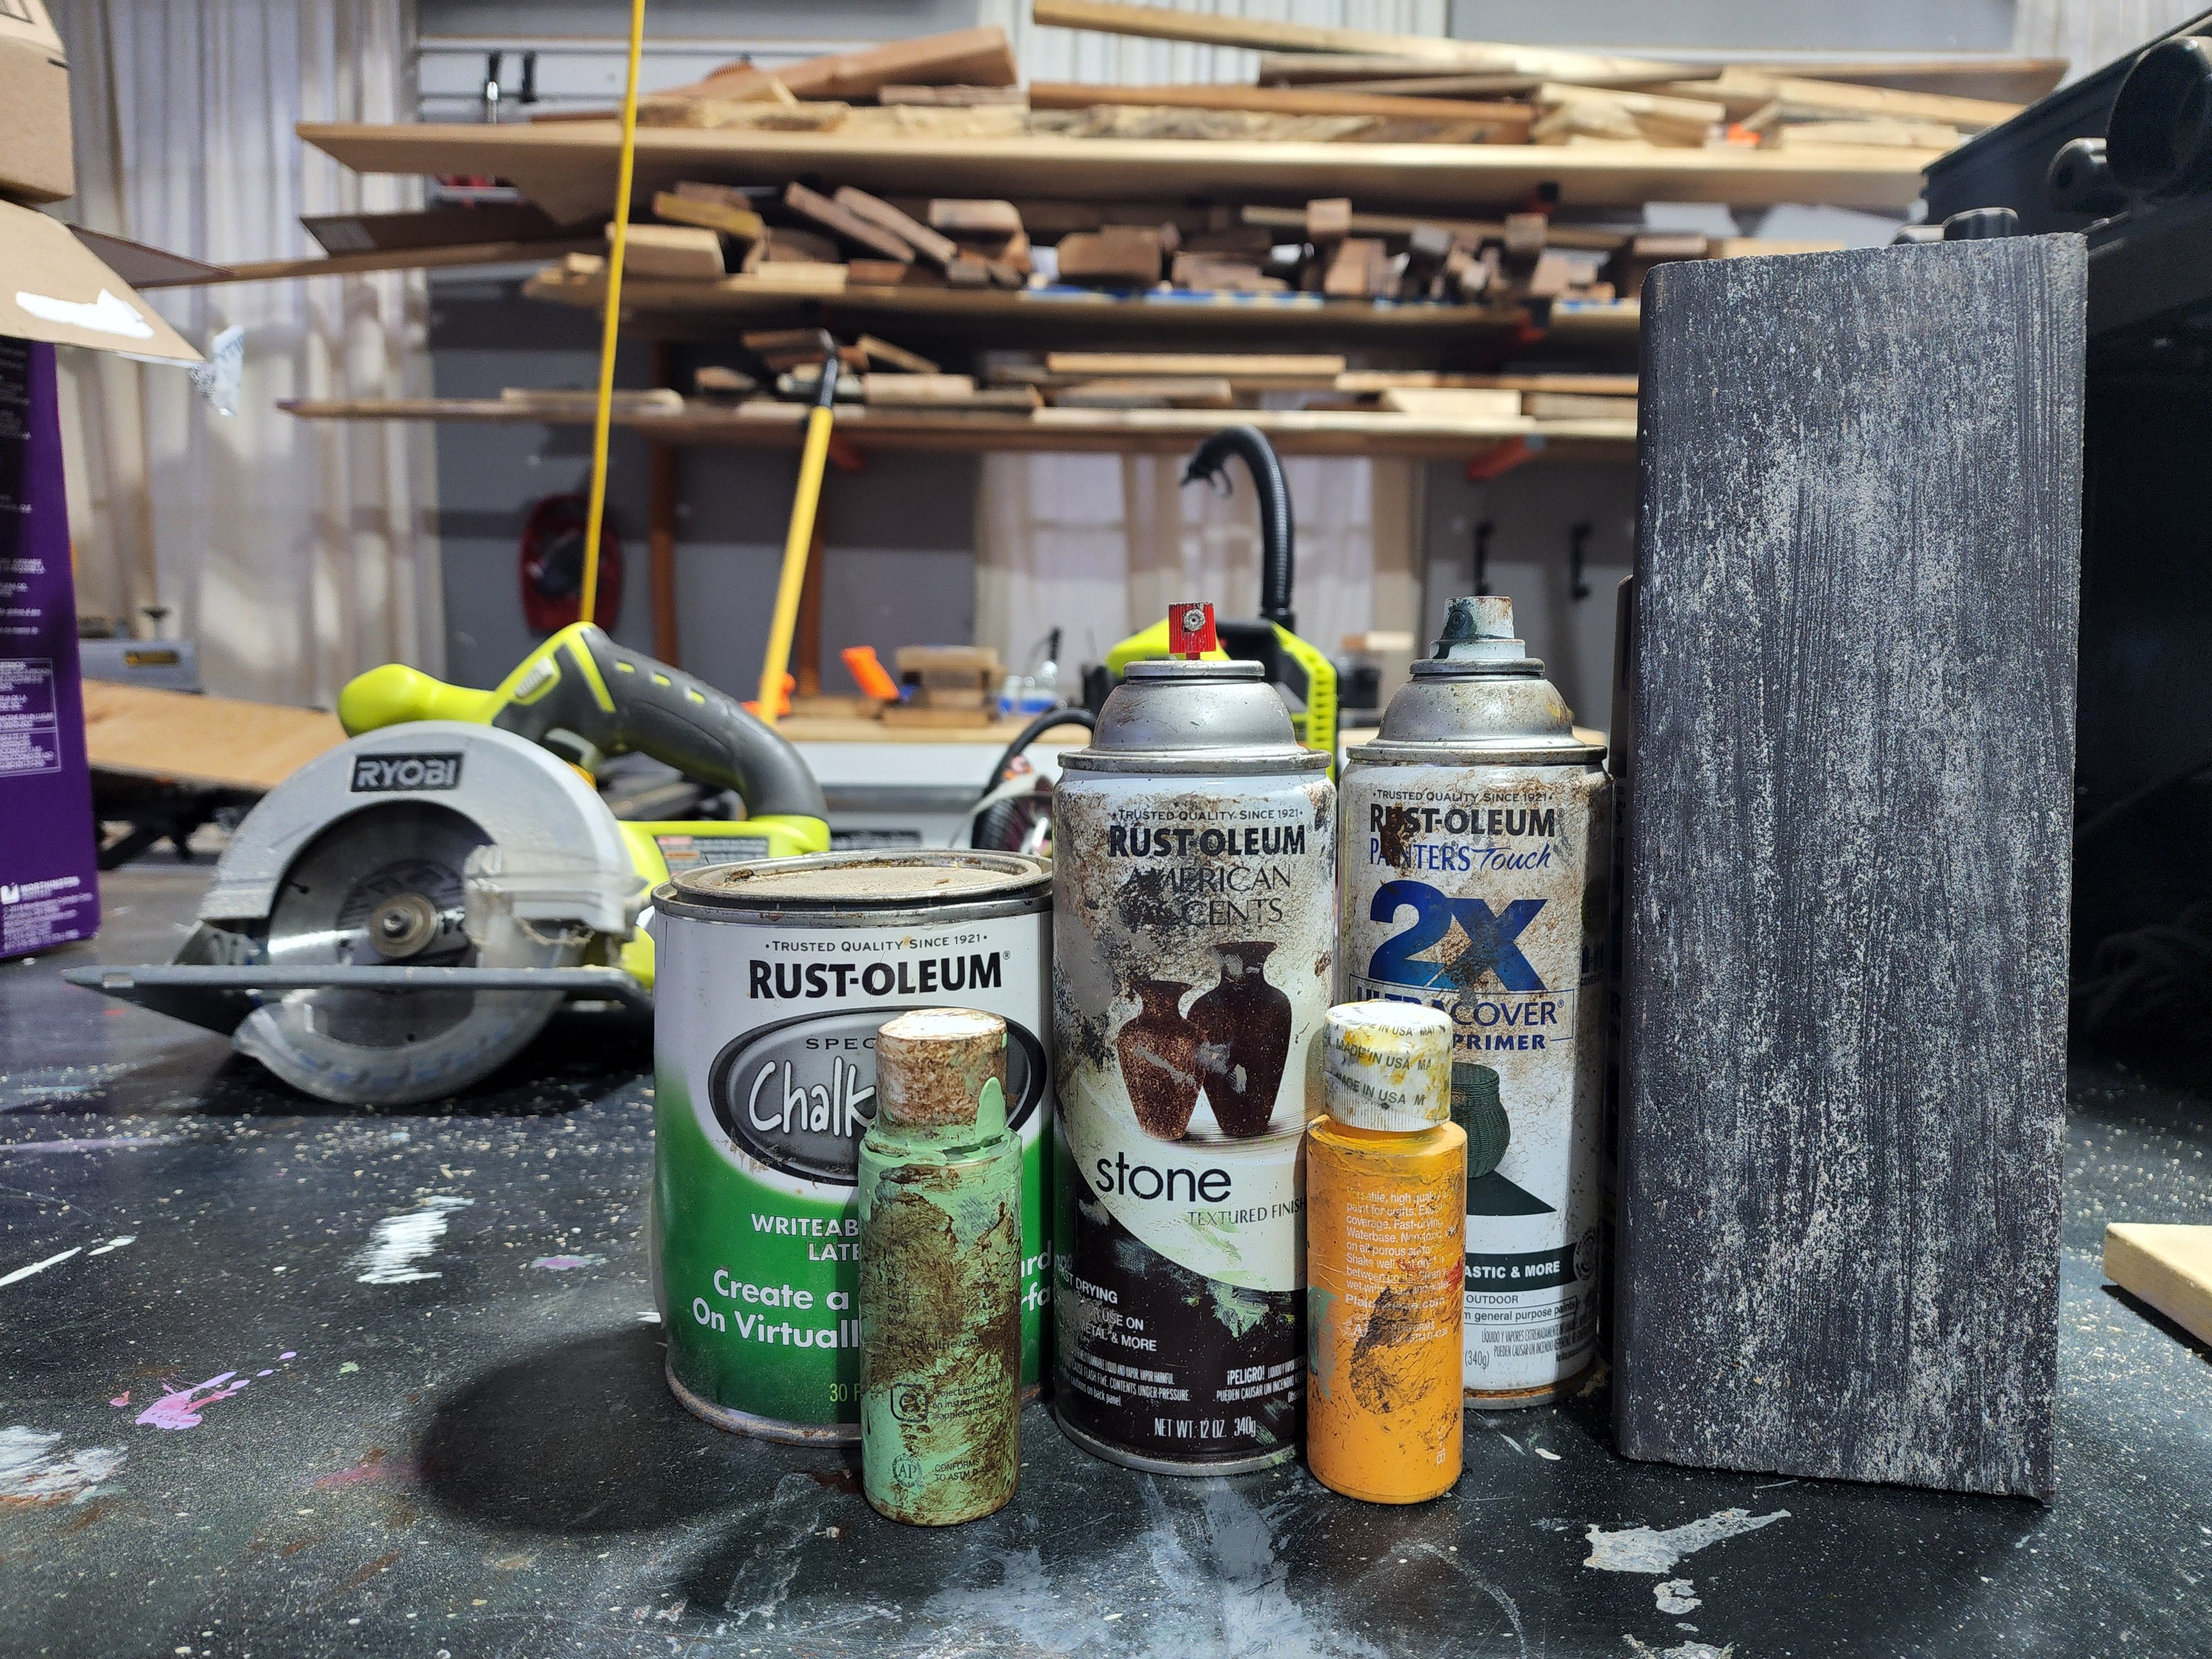
I am all about saving scraps and leftover paint but truthfully it’s extremely rare for things to work out as well as they did for this project. I had a three year old half can of chalkboard paint and an equally old half can of stone texture spraypaint in the garage. Both of which found a way to make the move with us last year. The chalkboard paint had a thick film on top due to neglect. The stone can had been thrown in the the trash pile and then rescued on more than one occasion.
The original reason I wrapped my paws around this project was because of my secret whiskey arcade project. The vibe of the arcade was becoming rustic with some modern touches.
Do you know what clashes with that (and every other style possible)? In your face shiny ductwork, not the cool industrial type…what an eye sore.
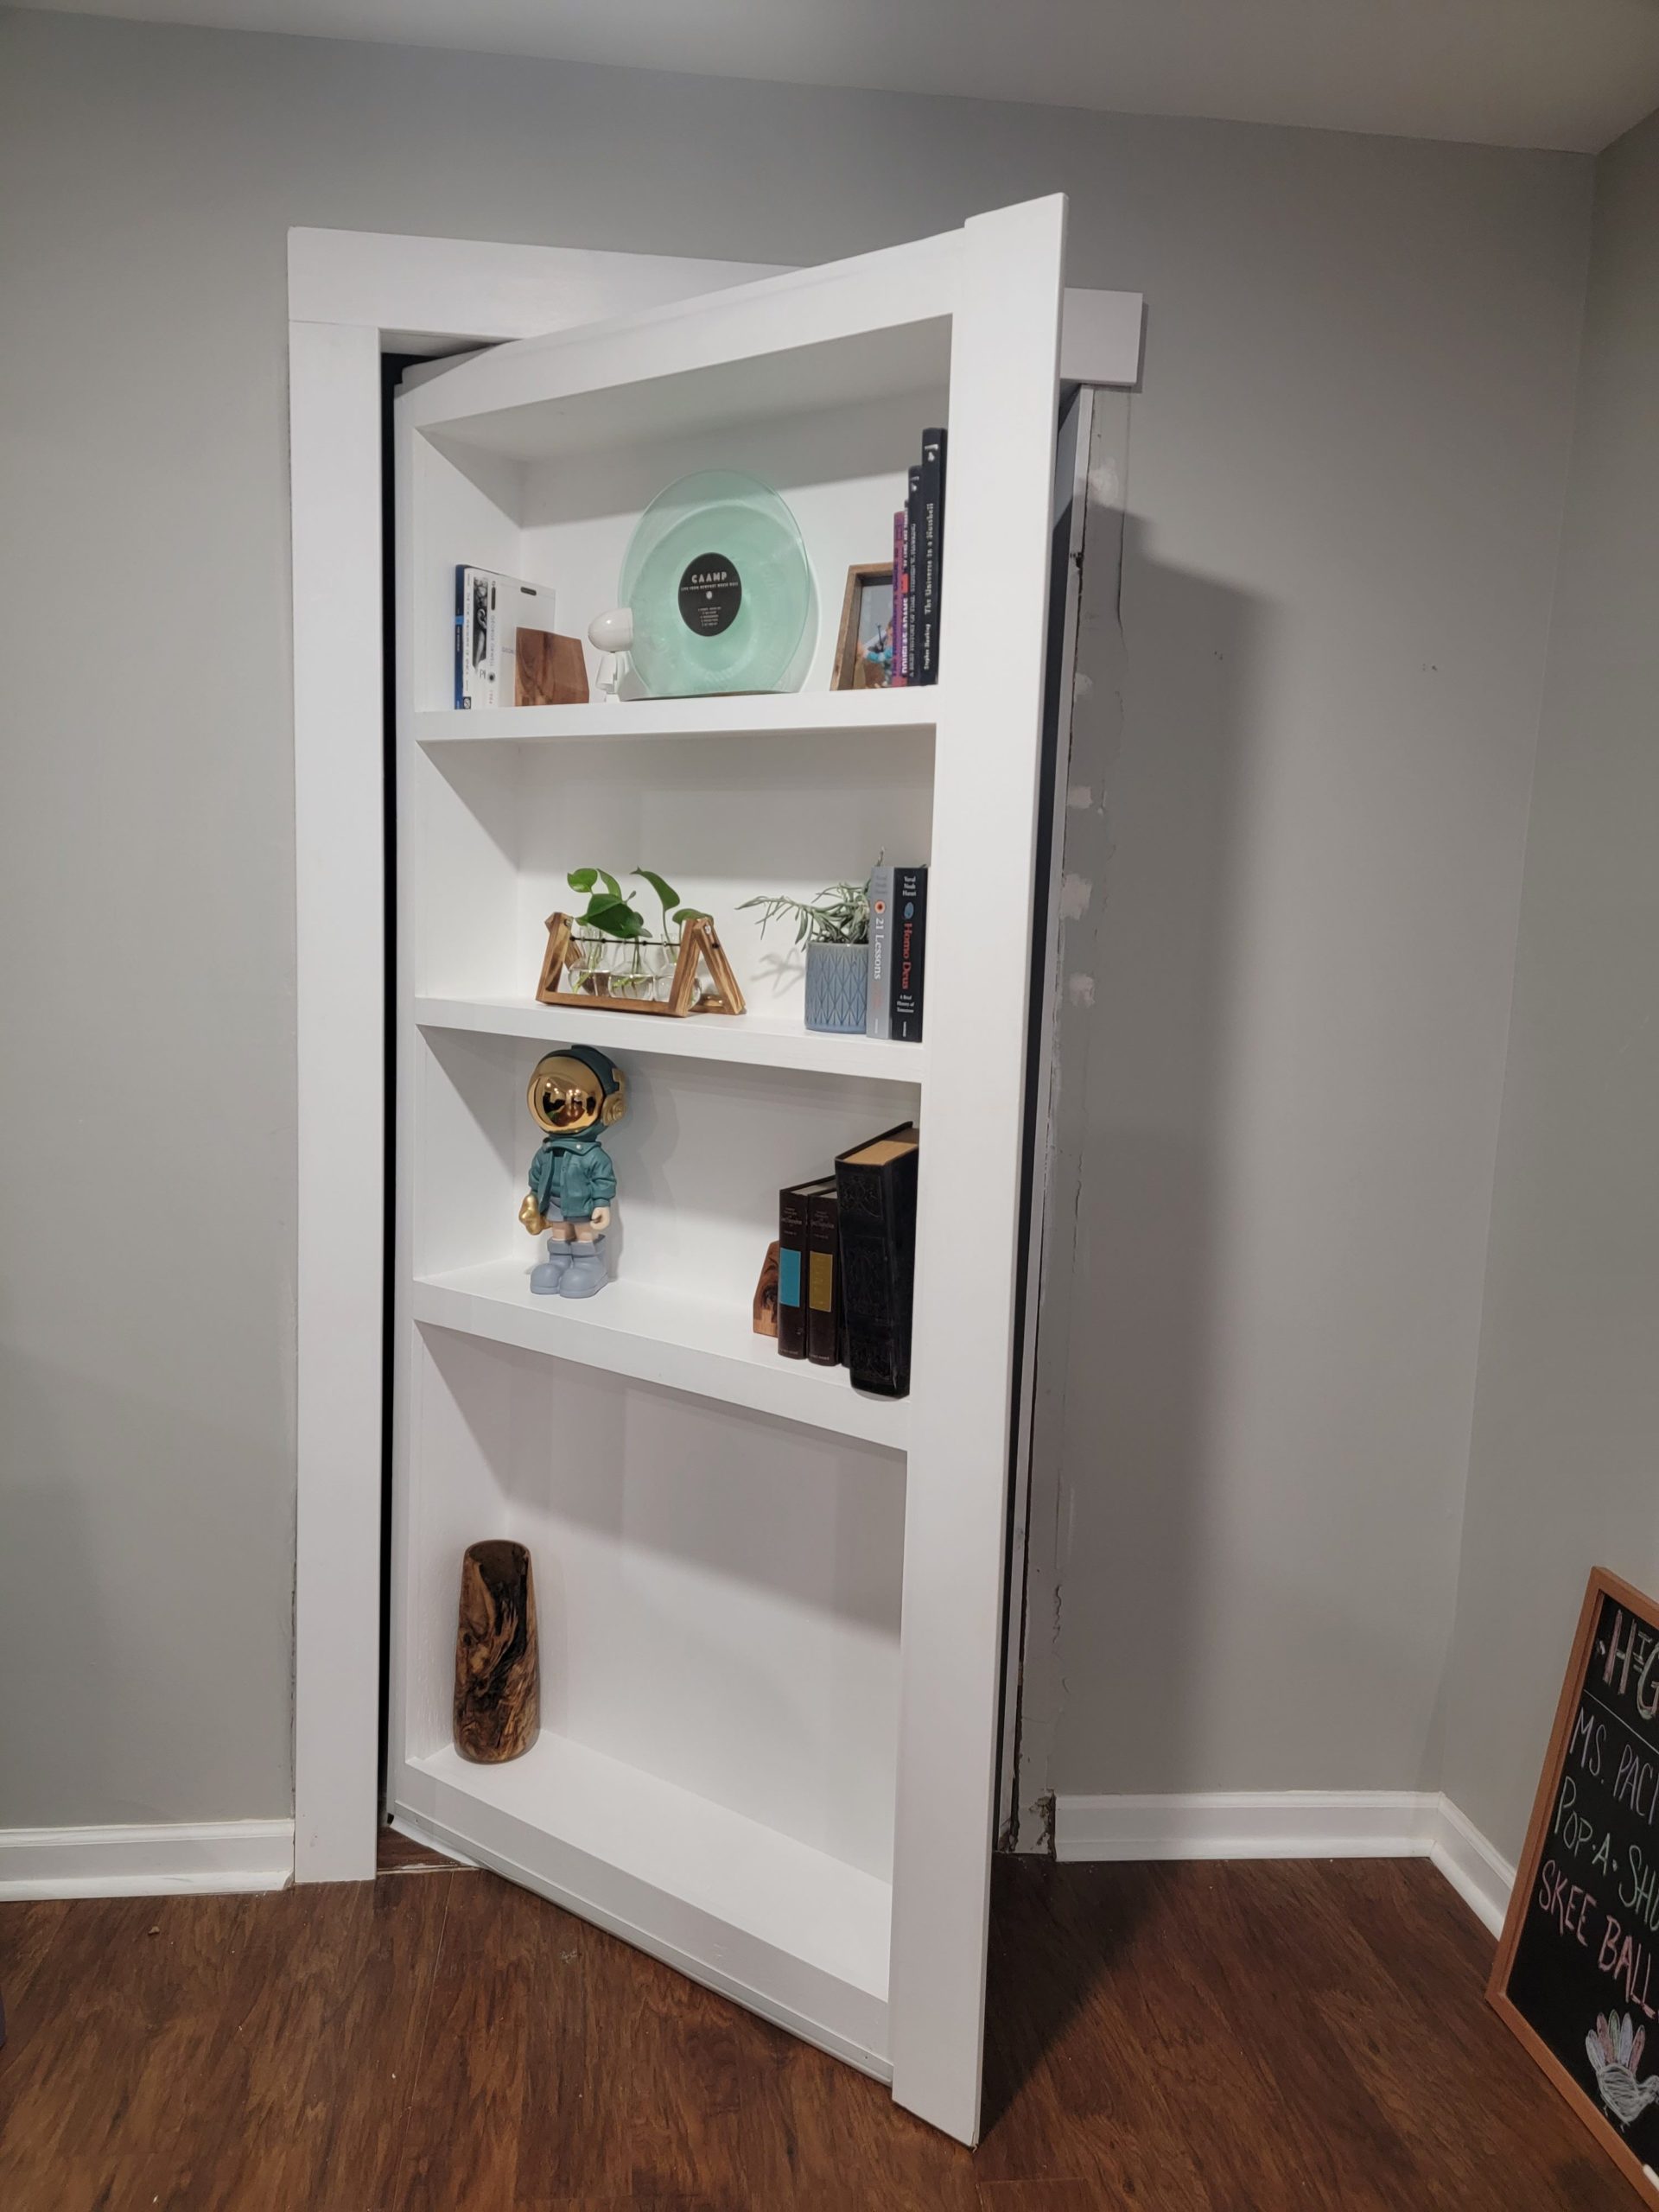
Here I am, opening a secret door bookcase walking into a whiskey bar arcade and instead of looking at the hand made bar or my options for a drink I am quickly distracted by the long shiny object that runs the length of the room. I decided that I wanted to case the visible side of the duct work in rustic weathered wood.
The problem? I didn’t have any rustic weathered wood.
The irony? Literally one week after finishing this project I found a truckload of old weathered wood for $20. This became an entire wall in the arcade.
I didn’t know what I was doing or going to do when I started painting the wood. I quickly realized that weathered looking paint is as simple as layering and creating depth, with just the right mix of colors weathered paint can be created from just about any spare, half empty partially spoiled paint that you have laying around.
I wound up liking it so much that I blended real weathered wood with my paintings to cover gaps on the wall and on the back of the bookcase door (see pics for examples).
I will eventually detail each project that I took on to make the arcade. For now, let’s focus on time traveling some wood.
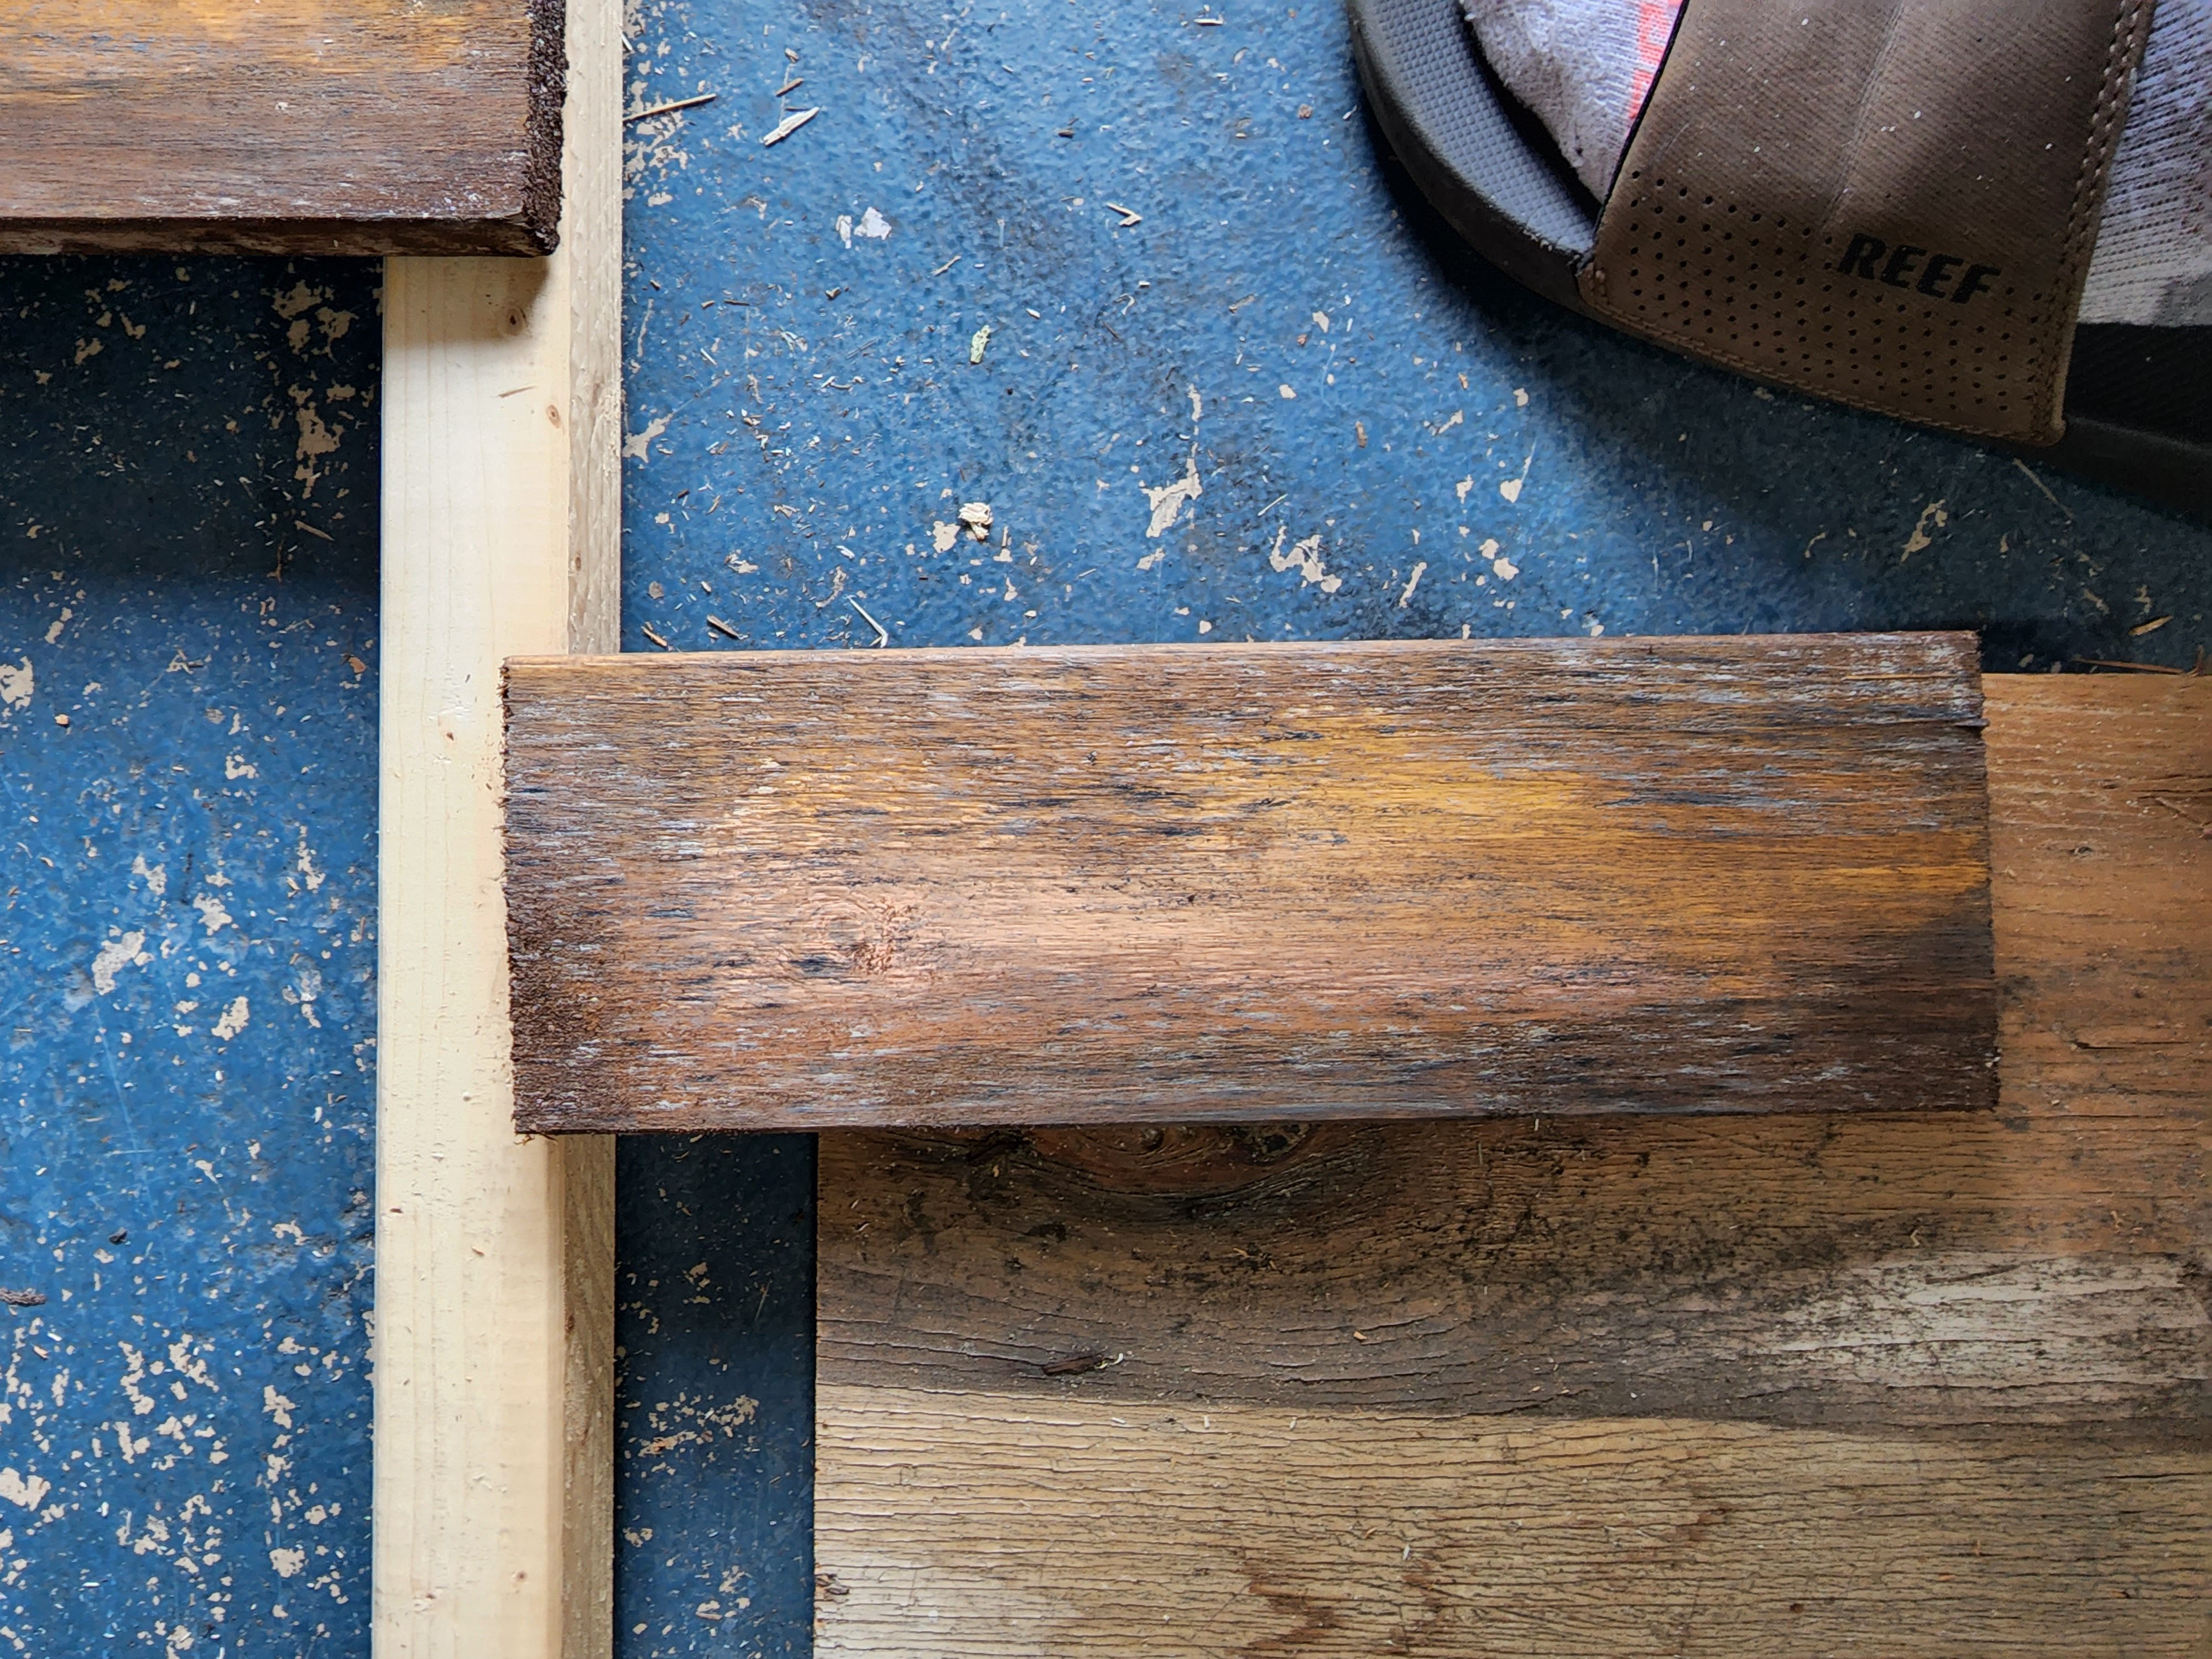
I picked up four 8′ boards on Home Depots clearance cart for $1 a piece. Above is what one section looked like after “weathering” it.
Weathered Wood Effect.
Table of Contents
Weathered Wood Effect: Before & After
Bookcase Door Before
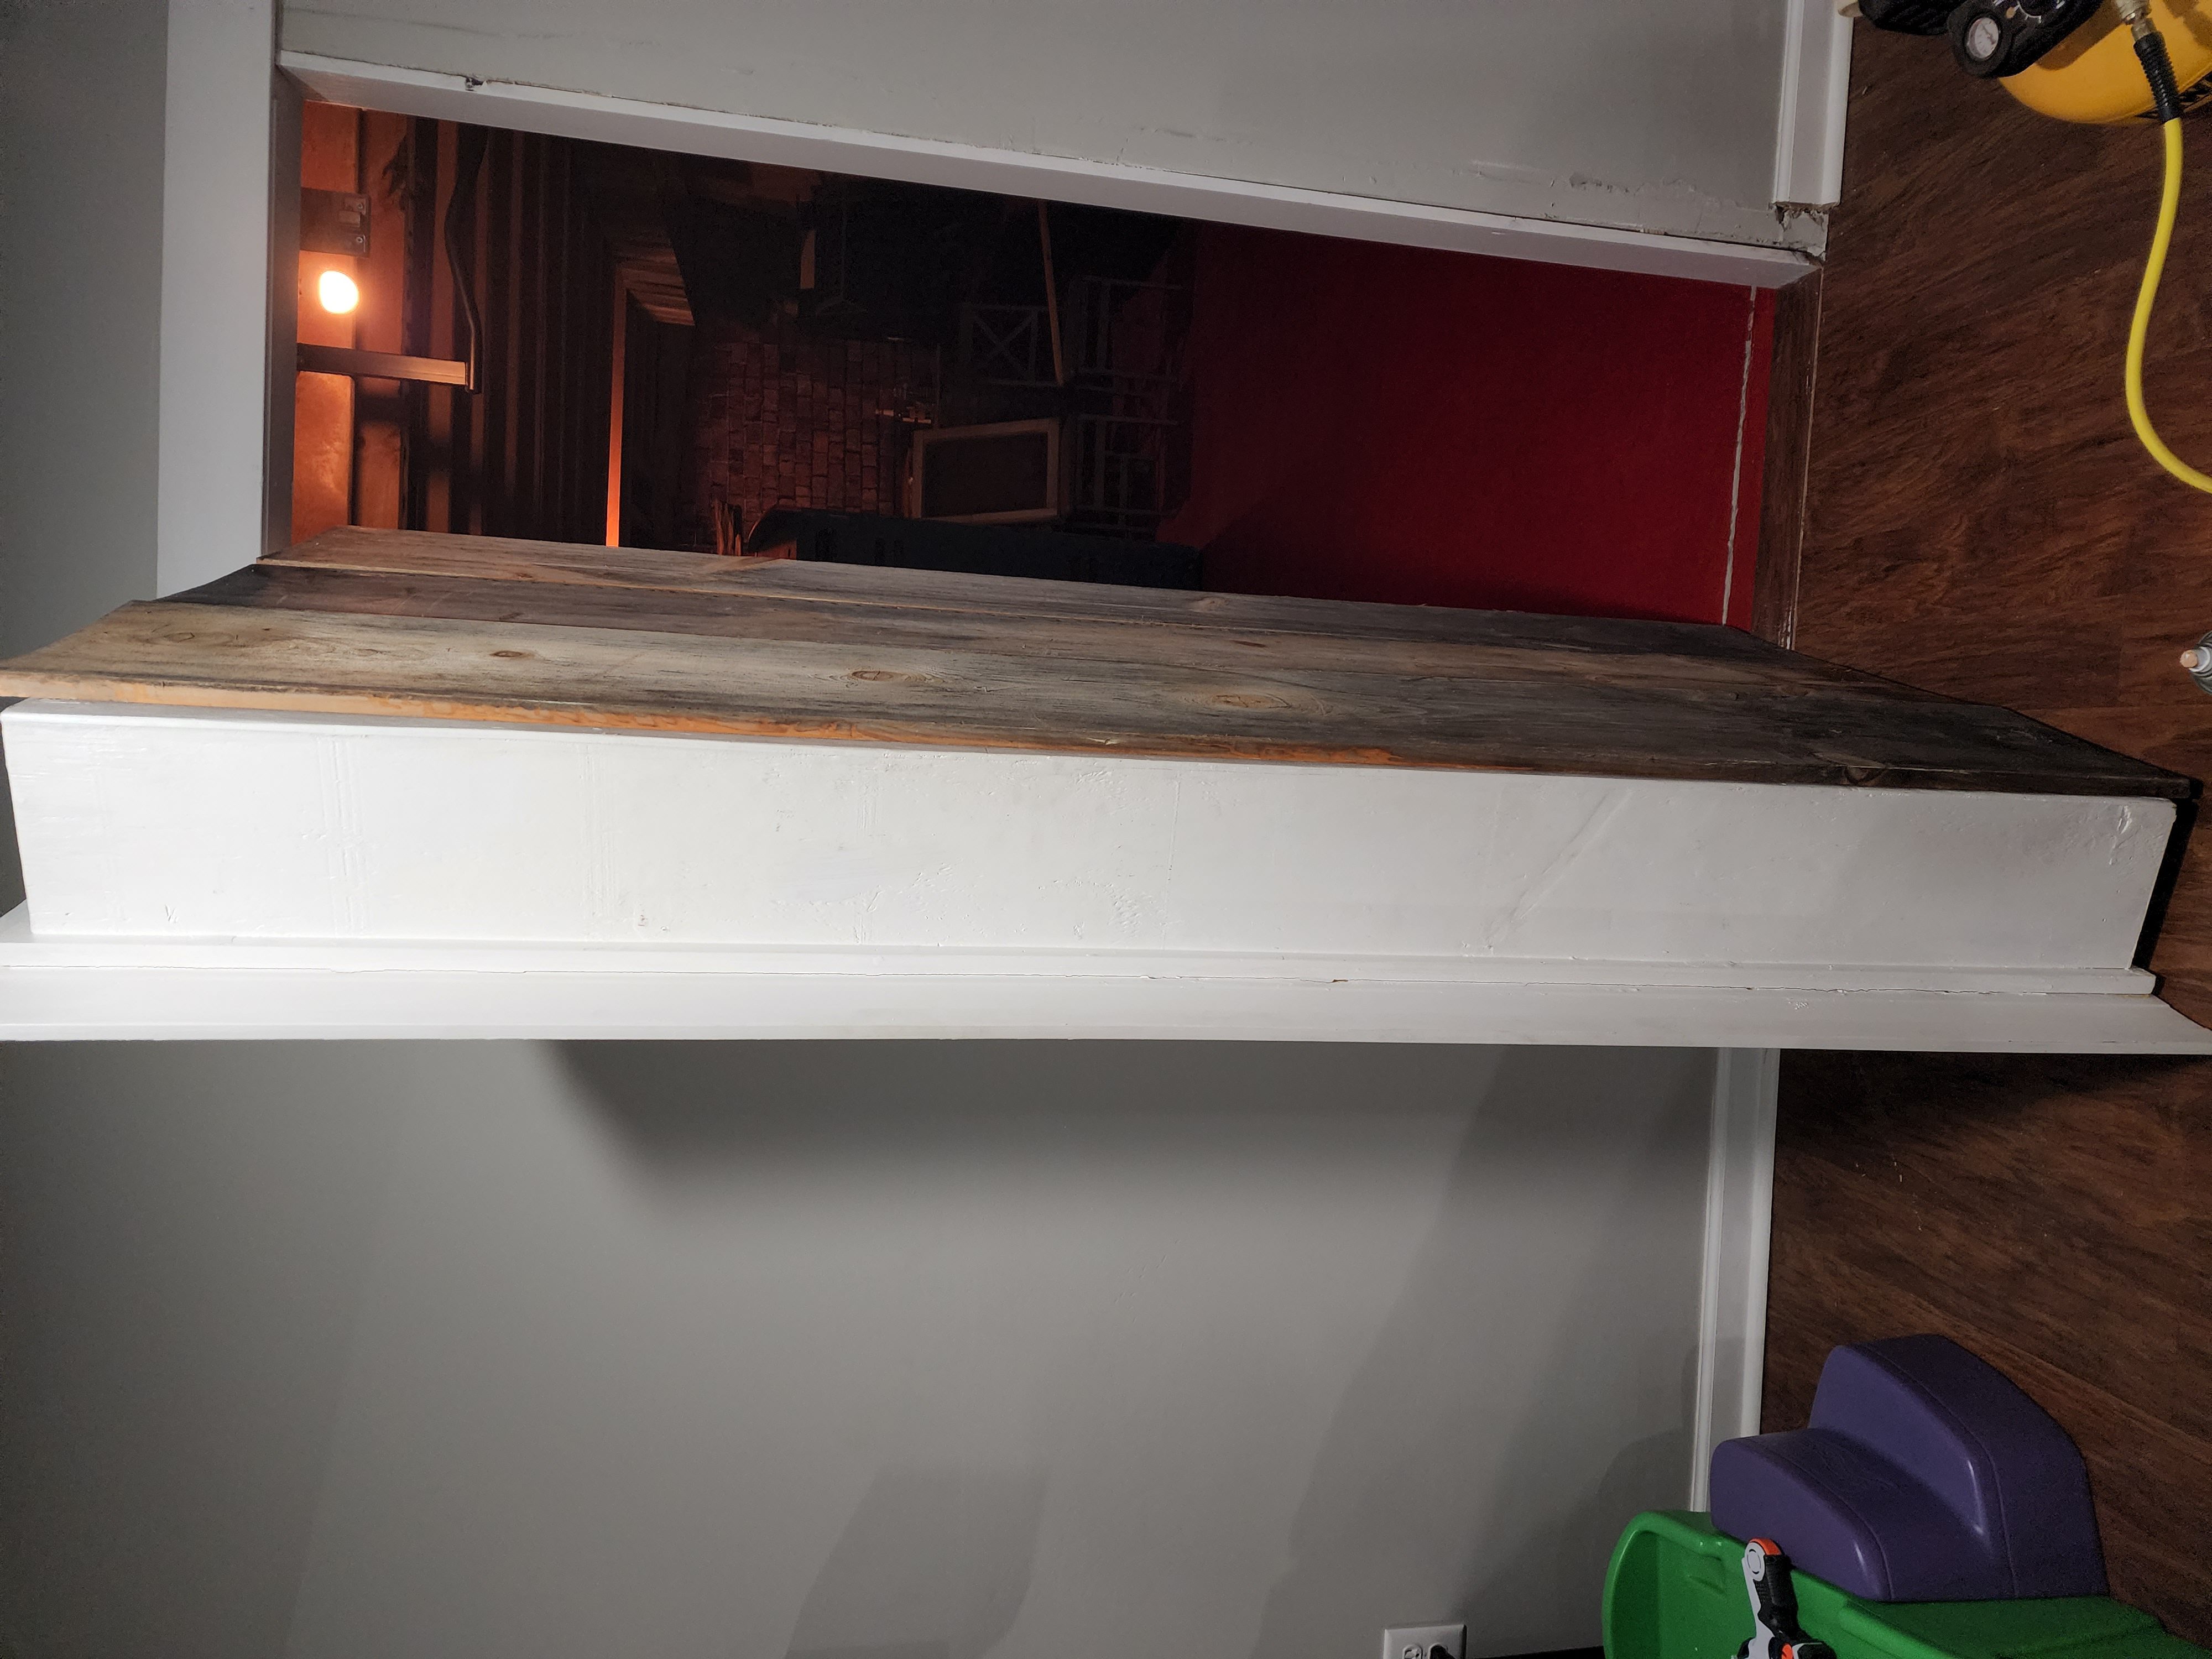
Bookcase Door After
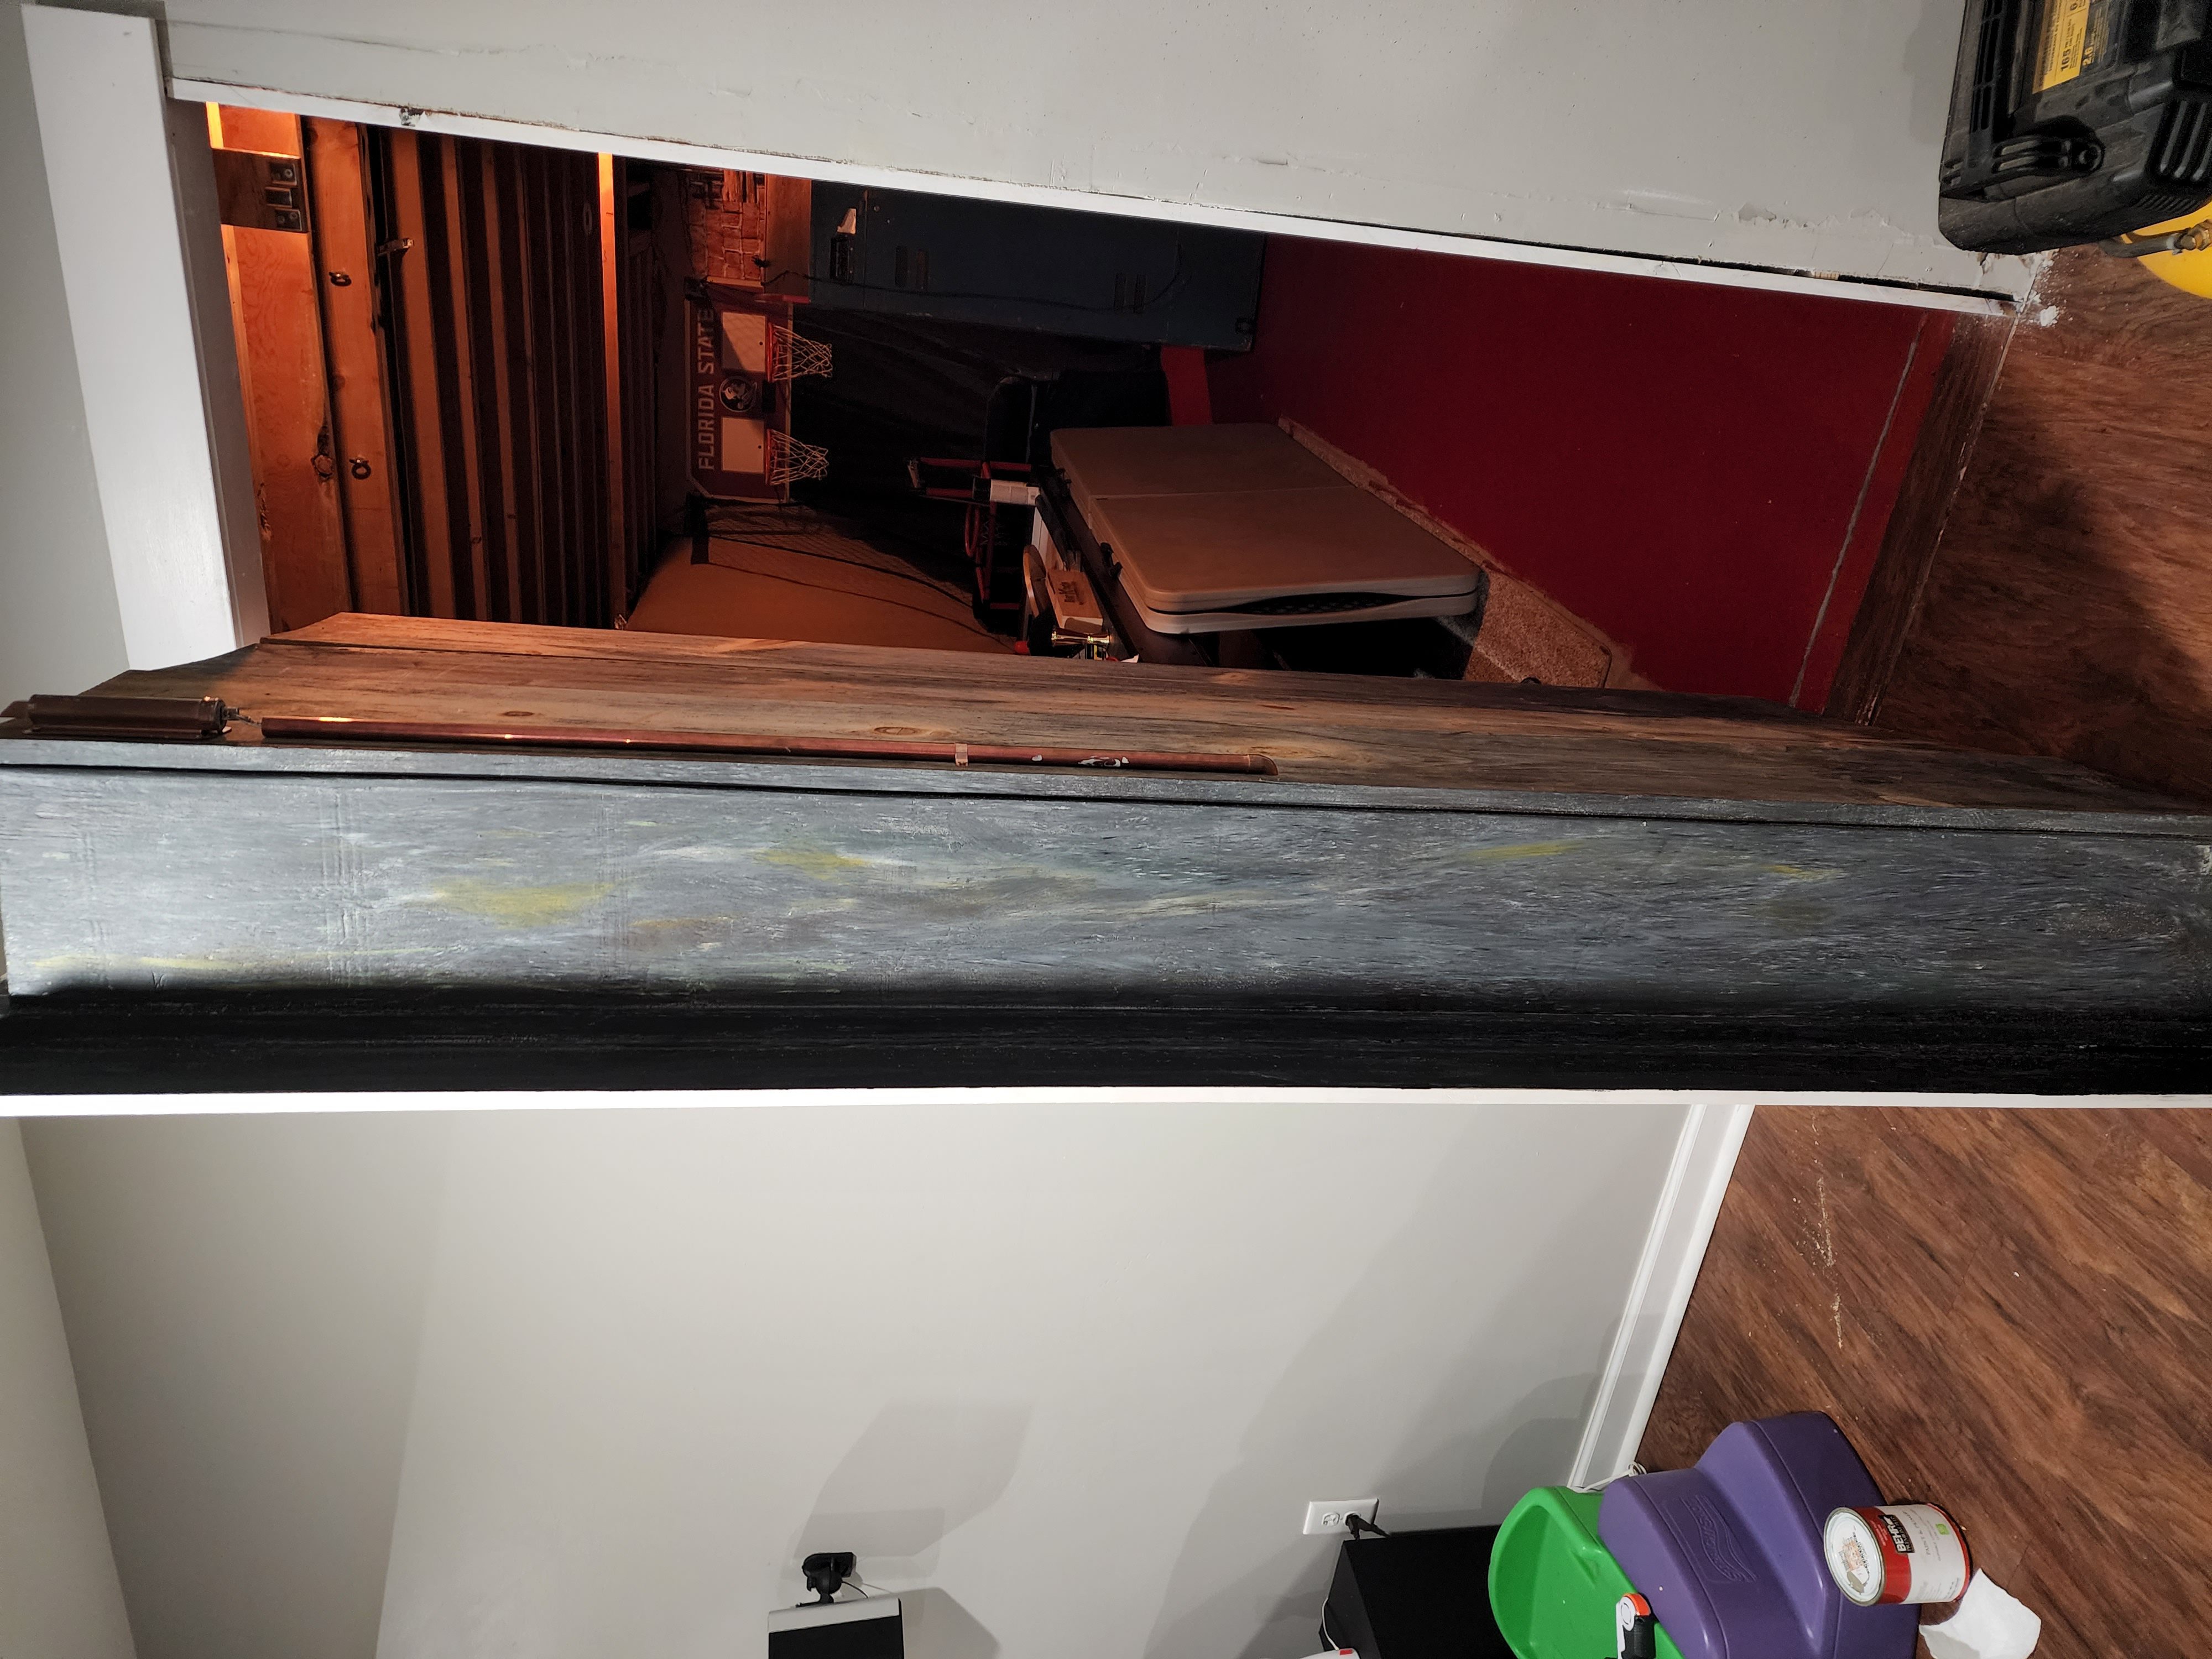
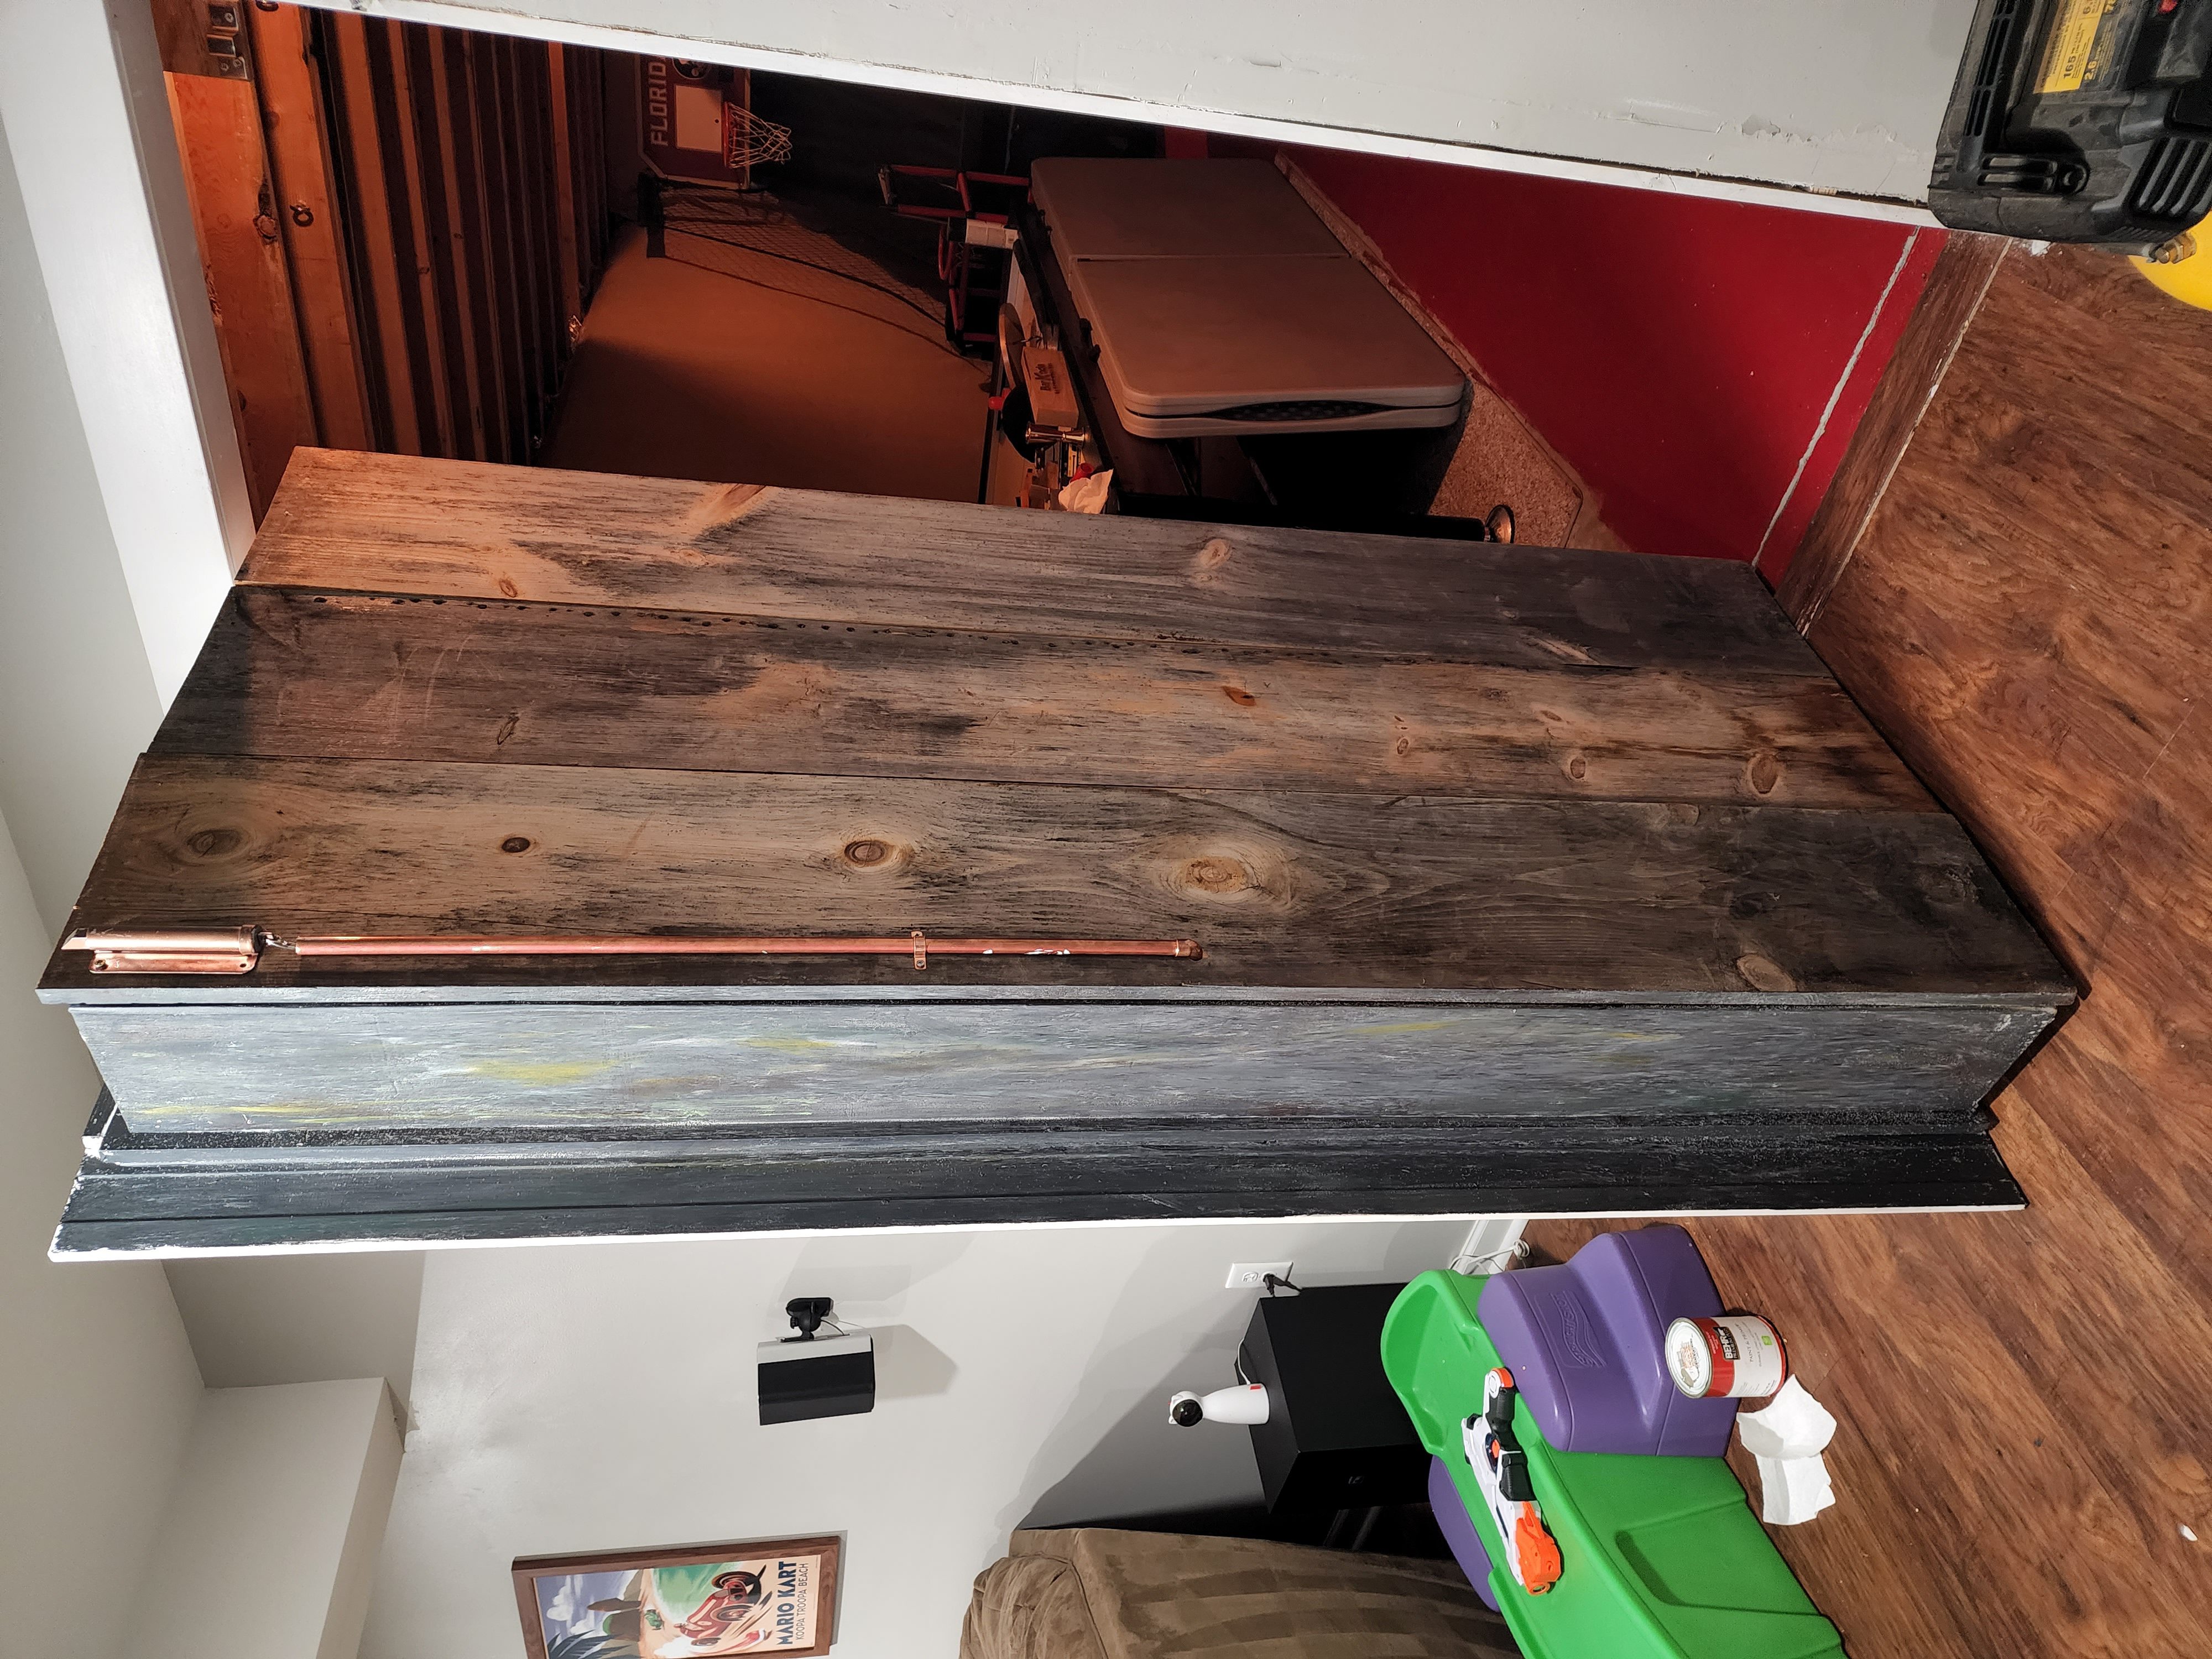
Secret Bookcase Doors?
These pictures are of a secret door bookcase that I built in my basement. Click here to learn how to build your own.
AC Duct Before
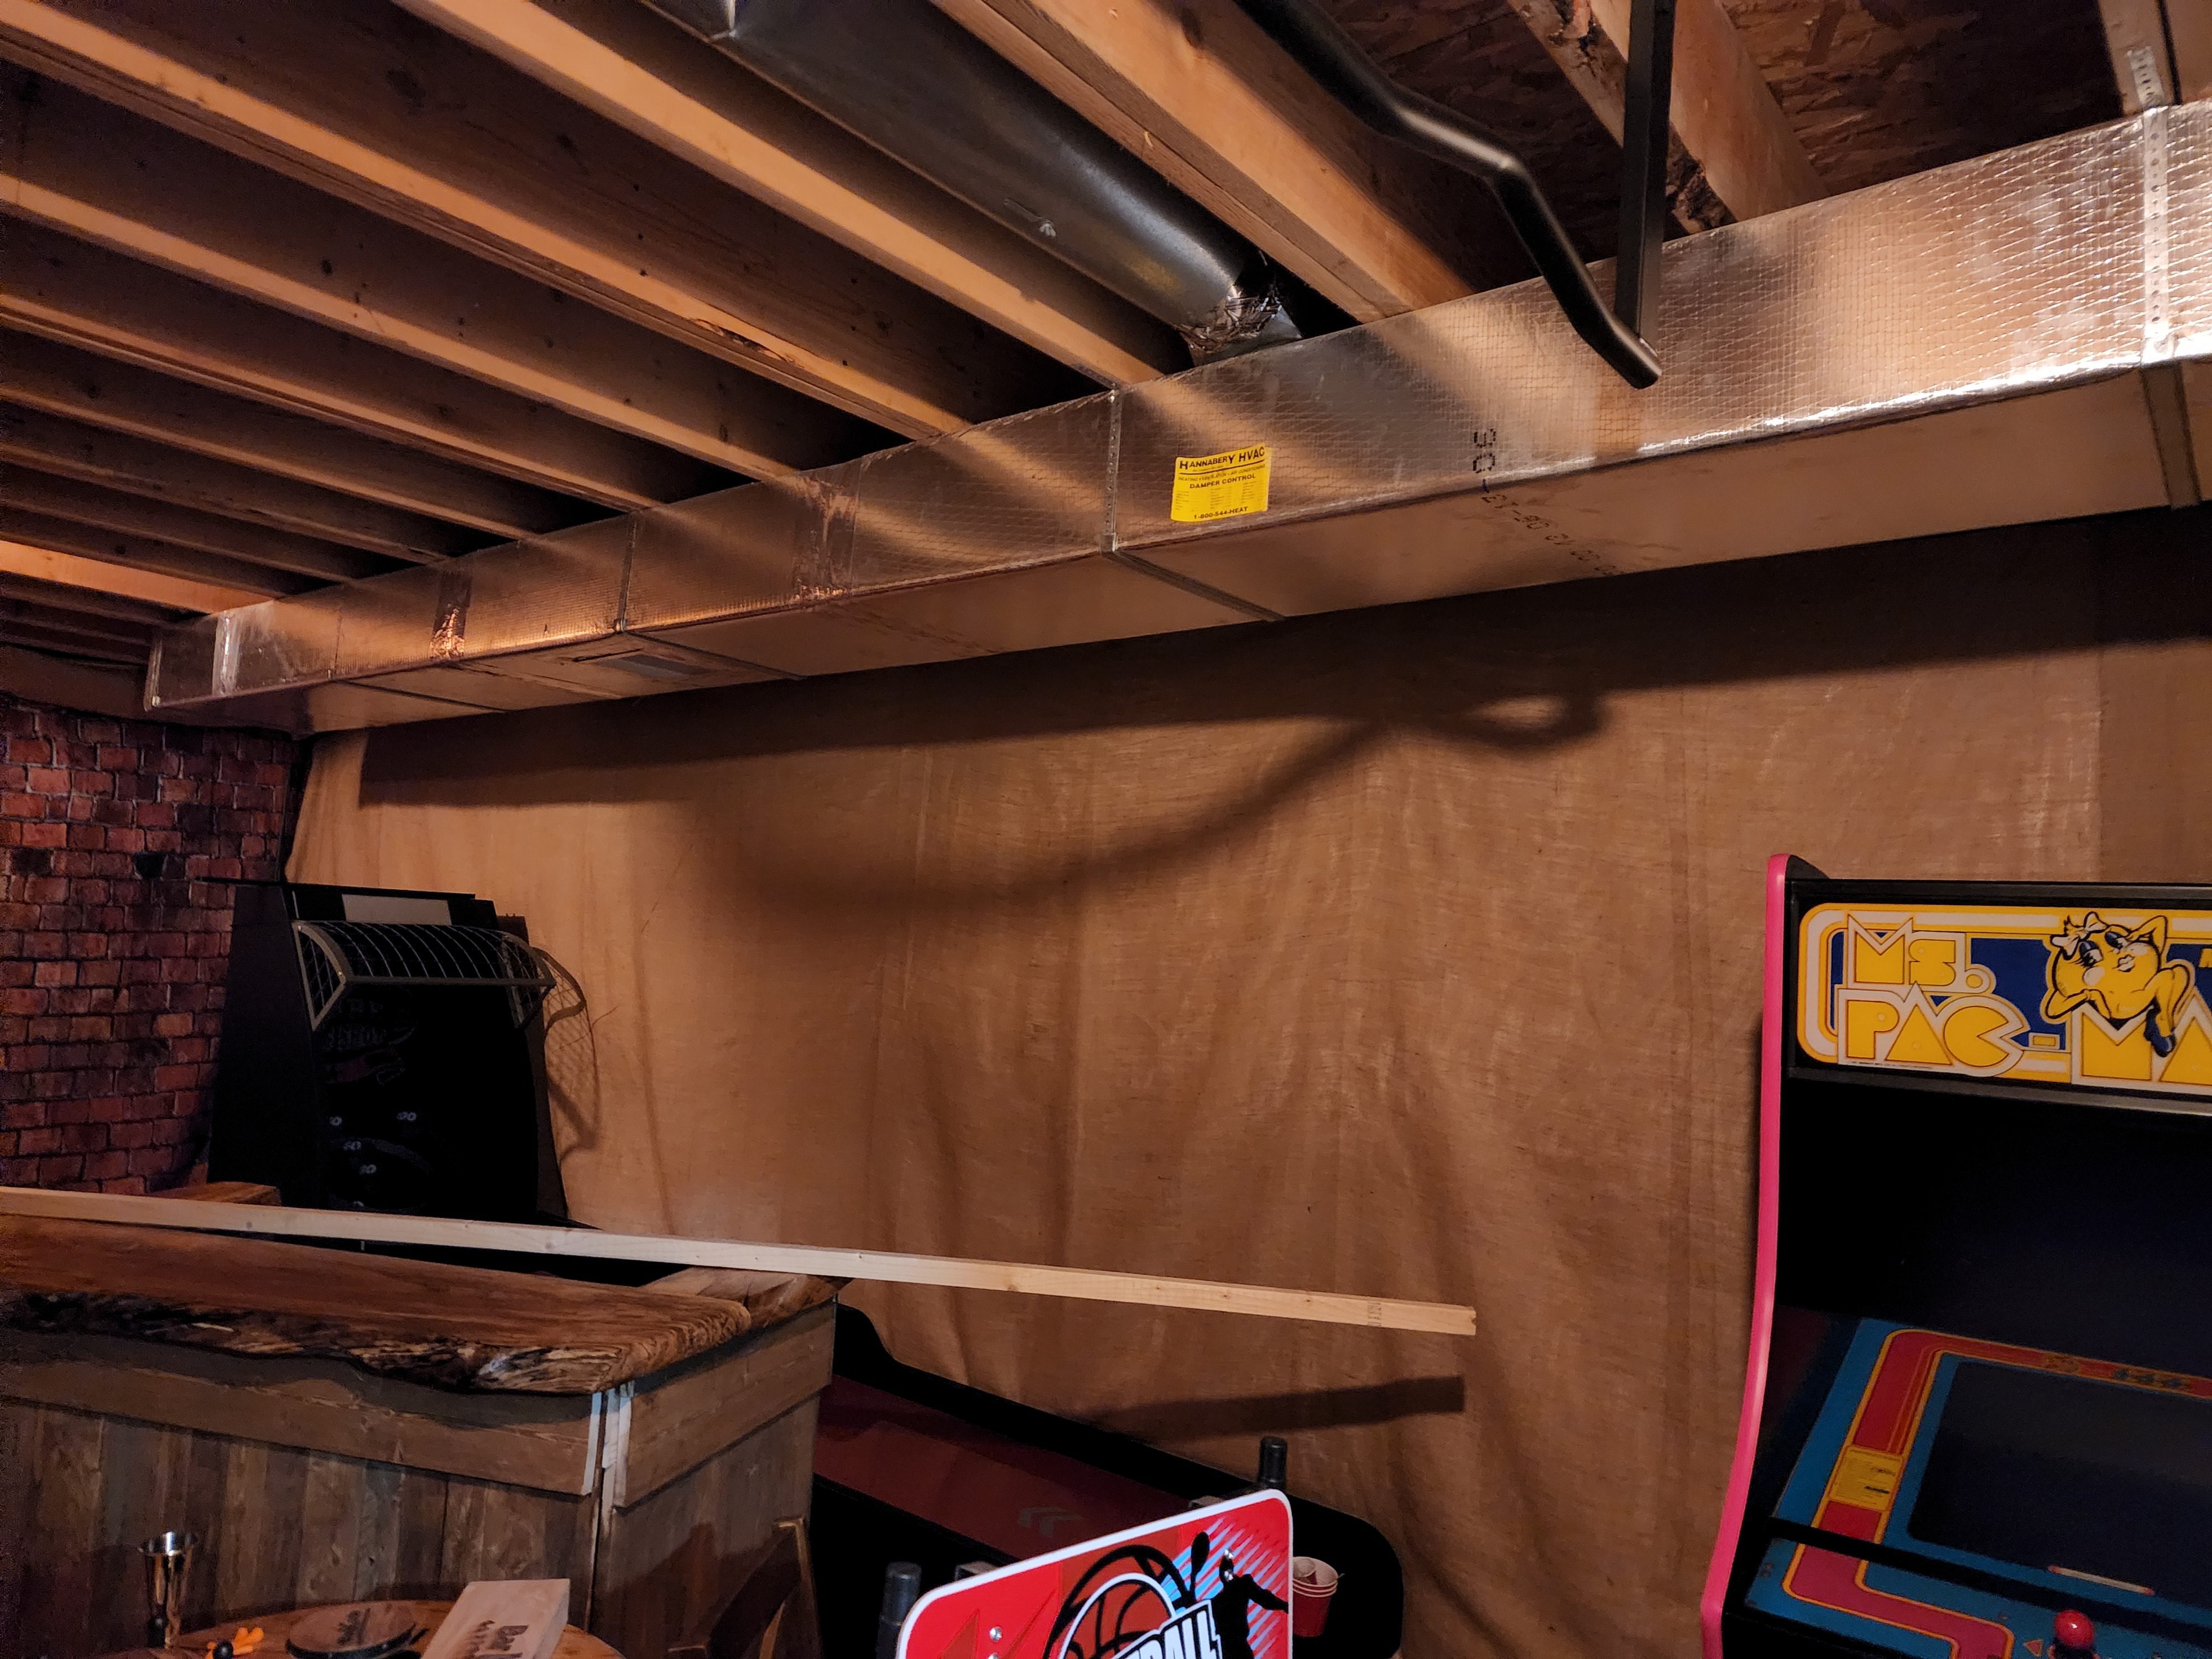
AC Duct After(ish)
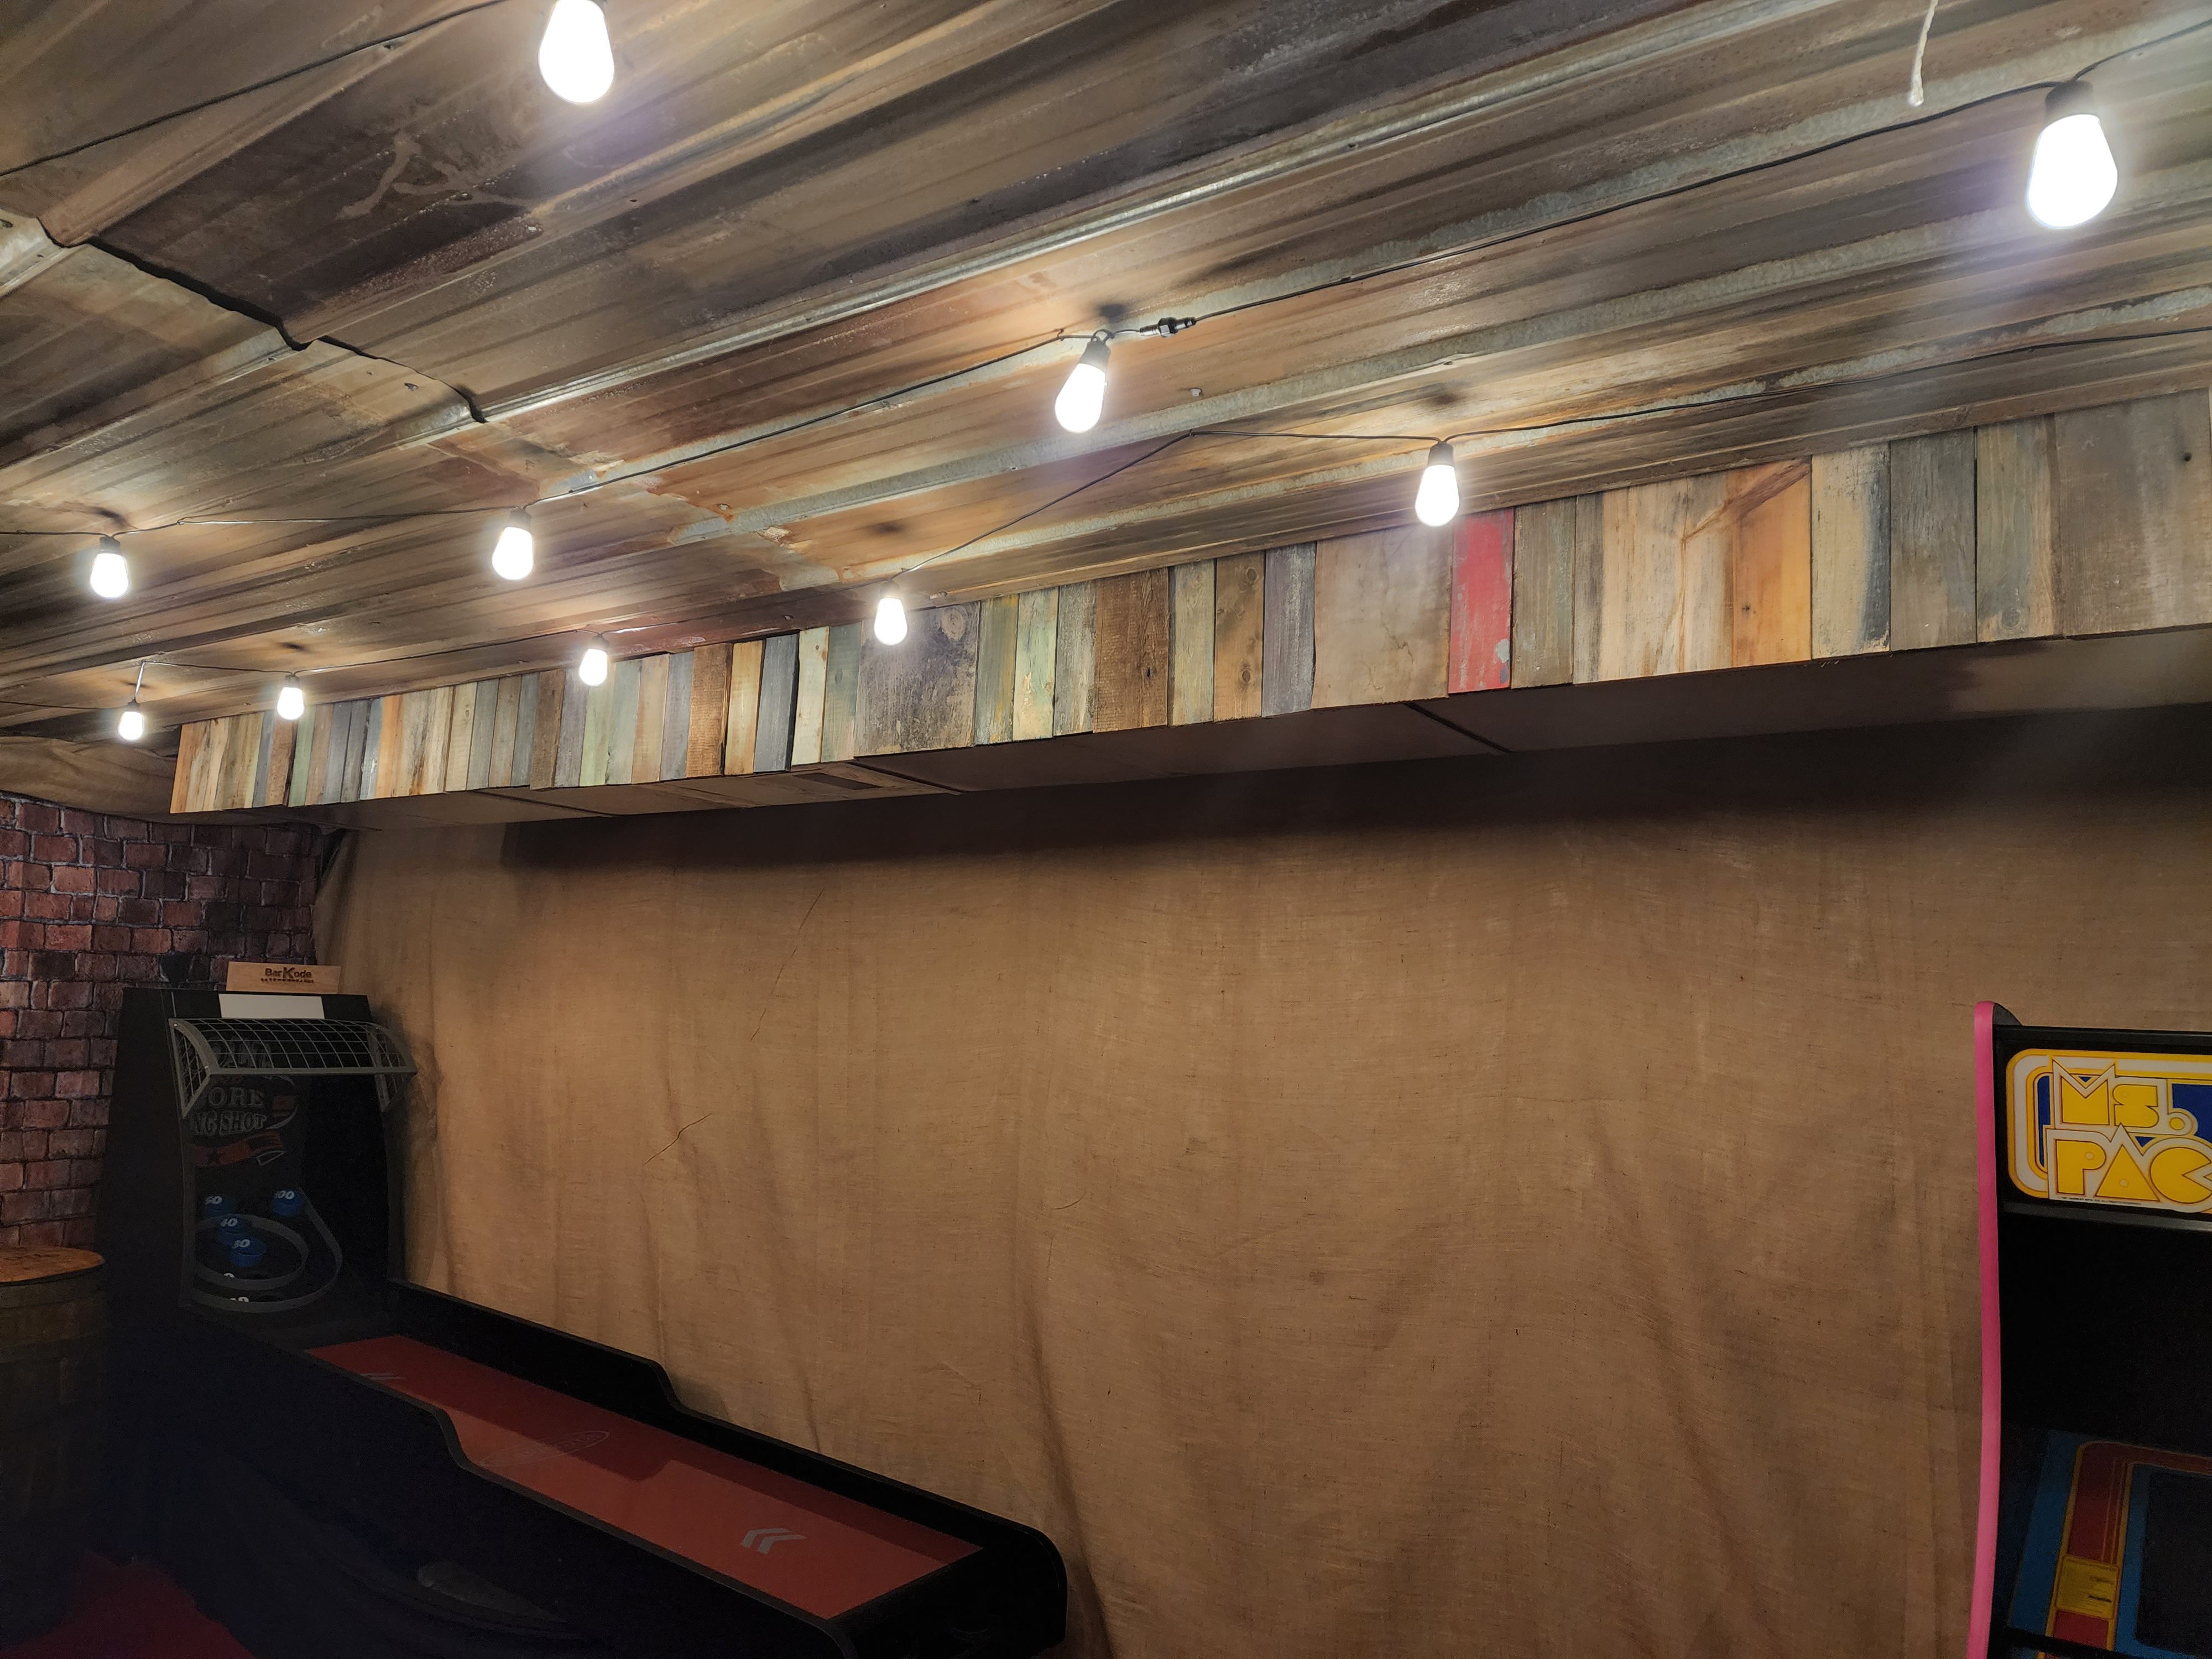
Weathered Wood Effect.
Materials
Weathered wood can add a rustic twist to any project. It also can serve as a focal point in design. When wood weathers it develops unique patterns and layers called patina – this gives the wood depth and character.
We are going to mimic that process by layering different types of paint on top of one another. The star of this show, stone spray paint gives the grunge that other paint lacks. A few pops of choice colors give the wood a backstory for the eyes viewing pleasure.
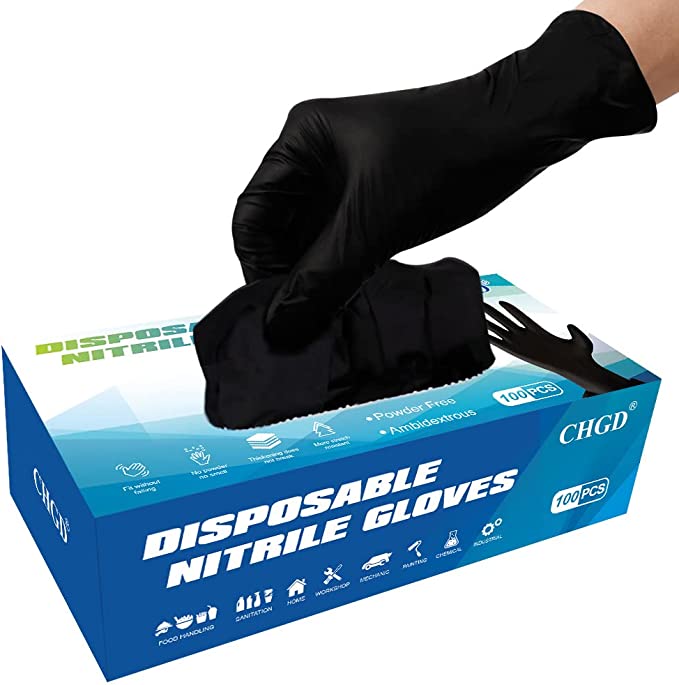
You need gloves for this one. I know, other projects claim to need gloves but I am telling you that you will absolutely want them to make a weathered wood effect. I went with yellow rubber gloves as I wanted thickness.
Weathered Wood Effect.
Setting the Base Layer
First, we need to set the base layer. I am going to talk through this with chalkboard paint but feel free to substitute it with another greyish black color that you have laying around.
The scratchy greyish tone of a single layer of chalkboard paint worked perfectly for my needs. Remember, this is just the base layer. If your project calls for a more brown tone then we can add it in heavier applications later in the process. The base layer is easy, just paint it on with a paint brush. Because these layers are thin I strongly suggest painting in one direction. Go with the grain of the wood.
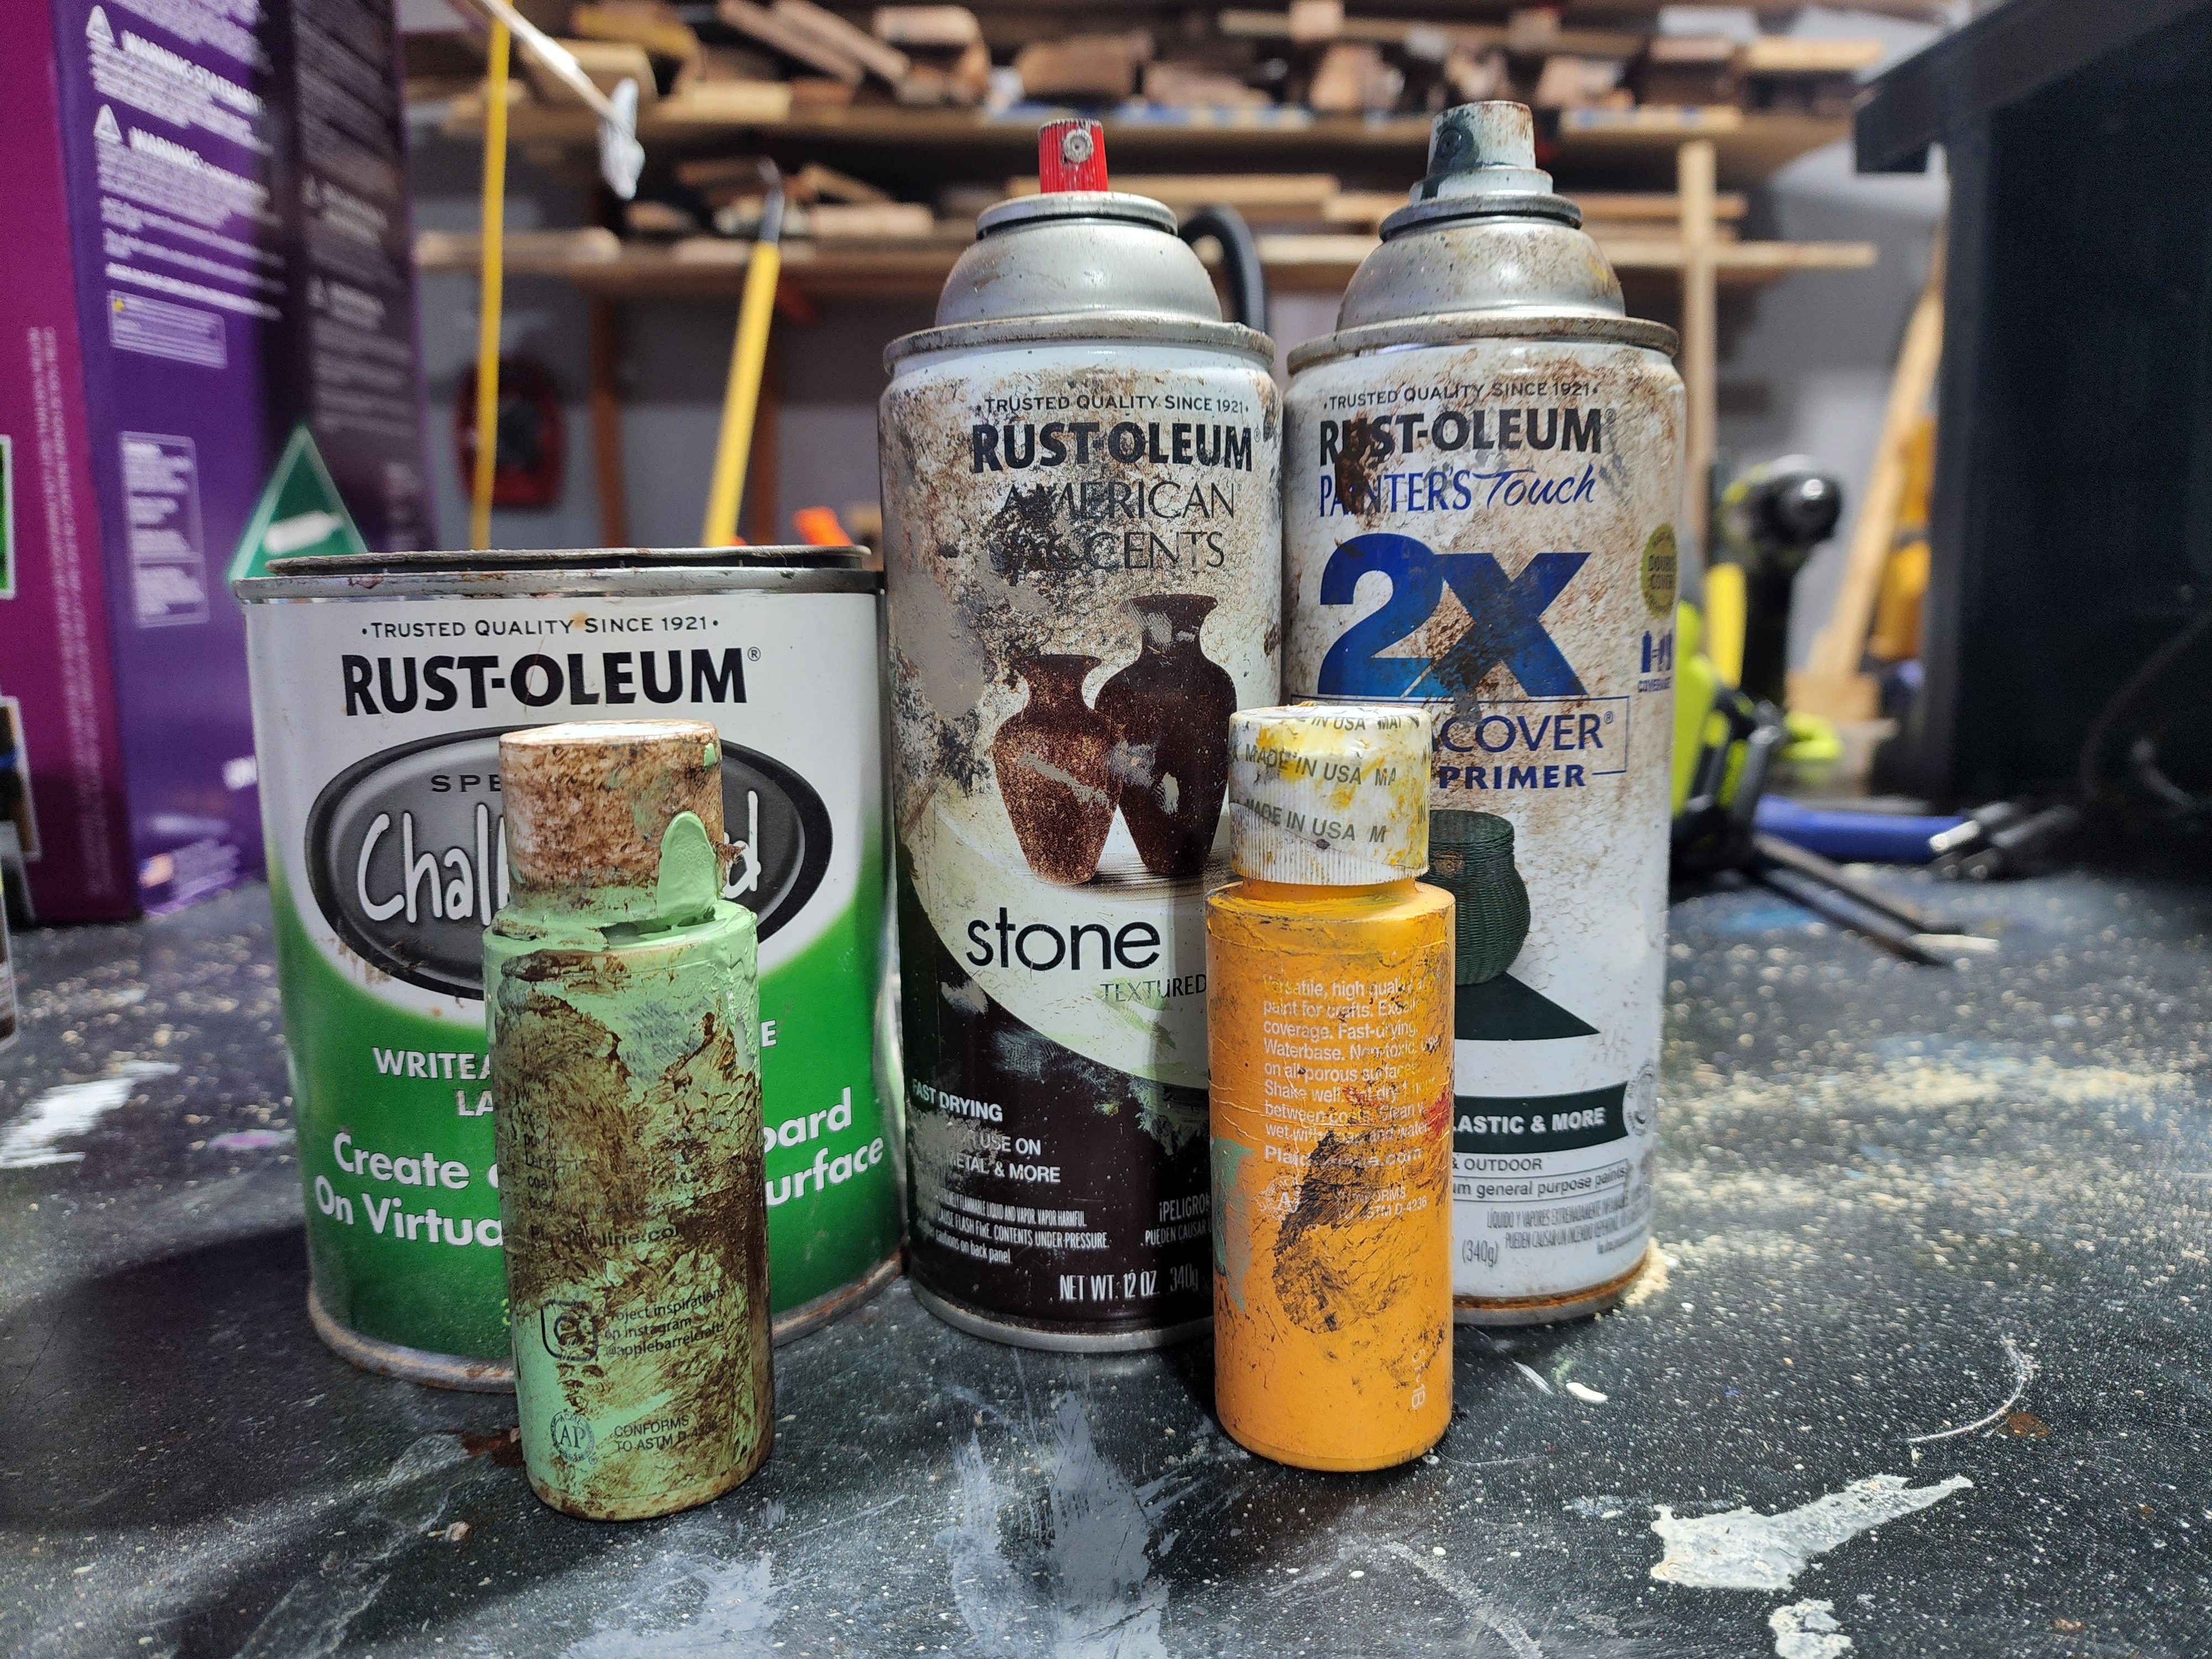
This was the A-team. The above paints were the stars of the show. That being said, choose your favorite bright accent colors that pop.
Weathered Wood Effect.
Break the Rules
Now we get to break the rules. Don’t wait for the paint to dry.
Hallelujah!
An age old rule shattered right here, at CraftyCatsman HQ. That’s right folks, do not let the paint dry for the weathered wood effect.
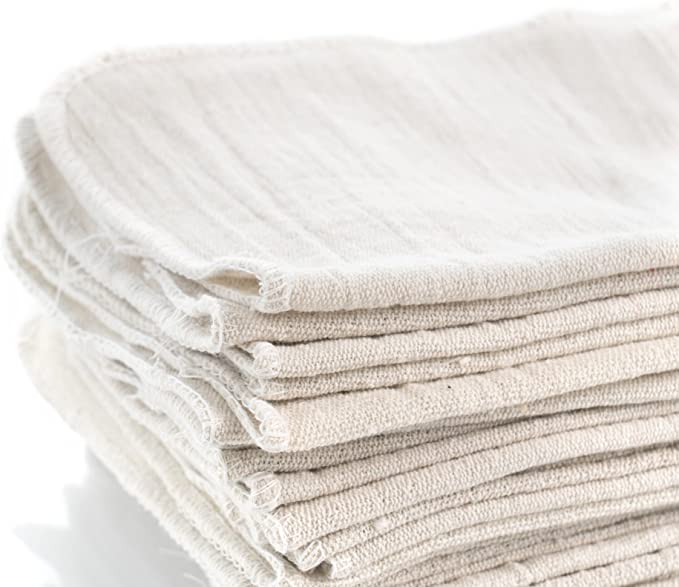
Instead, immediately dab your primary color with a rag or pointer finger and start to rub in the same direction as the base. Your primary color should be the color tone of what you want the wood to become (i.e., light brown, dark brown, white, grey, etc…). Do not overdo it, you want some of that base layer to come through.
This is where we first introduce the stone spray. All of the other colors are subjective but I truly think that you need to go ahead and use some sort of texture spray here, the stone was perfect because when rubbed into the wood it gave it grit and grunge.
Spray the wood with a light spritz (think cologne/perfume as an adult, not a teen using axe bodyspray). This time let the spray sit for 1-5 minutes. Take this time to look at the board and figure out what accent color(s) you want to use.
Once the arbitrary clock is up take a rag or your gloved finger and lightly brush the wood so that the stone spray starts to streak. How hard or light you do this will determine how blended or grungy the look is. This isn’t the final application of the stone so don’t get all dramatic in your evaluation.
Weathered Wood Effect.
Develop an Accent
Next, dap a few spots with an accent color. This color should pop, think bright blue, aquamarine, purple, green etc..). I did this a number of ways and there really is no right way to do it. One method is to squirt the paint colors on to something and then dip only the corner of the brush or the tip of a rag into the color.
Here is the key, without touching the wood, move your hand back and forth above the wood in the same direction of the grain. Think pendulum, not exactly back and forth but along some set pattern….slowly lower your hand until the brush or rag starts to touch the wood. Let it touch certain parts of the wood harder than others. Meaning, you will pool up some of the accent color in some spots and none in others. After you’re done, take a rag and rub the accent paint in the same direction of the grain. This will make the color streak and hopefully it will not look too uniform.
After this, apply one more stone spray. Pay attention to what part(s) of the wood look brushed or painted. You want the wood to look naturally aged and so a glob of bright blue paint would likely ruin that feeling. Let the stone sit for a few minutes and then rub it in.

Weathered Wood Effect.
Layer Up

At this point it is purely subjective. For some boards I applied 4-5 more layers that consisted of various colors to get the weathered wood effect that I wanted. I almost always applied stone spray after 2-3 layers of other colors. For some pieces I used brown spraypaint, for others I used green, for others I used both. Orange and teal work really well as accent colors. After you rub them in and layer them with darker colors it gives the wood depth.
The skill to draw photo-realistic images of peoples faces, cars and objects is not one that I may ever have. My handwriting looks like kitten-scratch, but I absolutely love chaotic art. Weathering wood doesn’t take any particular skill but it is incredibly fun trying to layer different kind of paint in a way that looks natural in the end. It’s the kind of art that you feel crazy doing but the end result can be mesmerizing.
I hope you all create some beautiful things with this tutorial. Please feel free to share some finished pictures of your weathered wood effect with us – TheCraftyCatsman@gmail.com
Weathered Wood Effect.
Installing Weathered Wood on an AC duct
Let’s hide that unsightly reflective rectangle
This project was easy to break up into steps. The work was simple and it was fun getting the kids to help with the painting.
Before
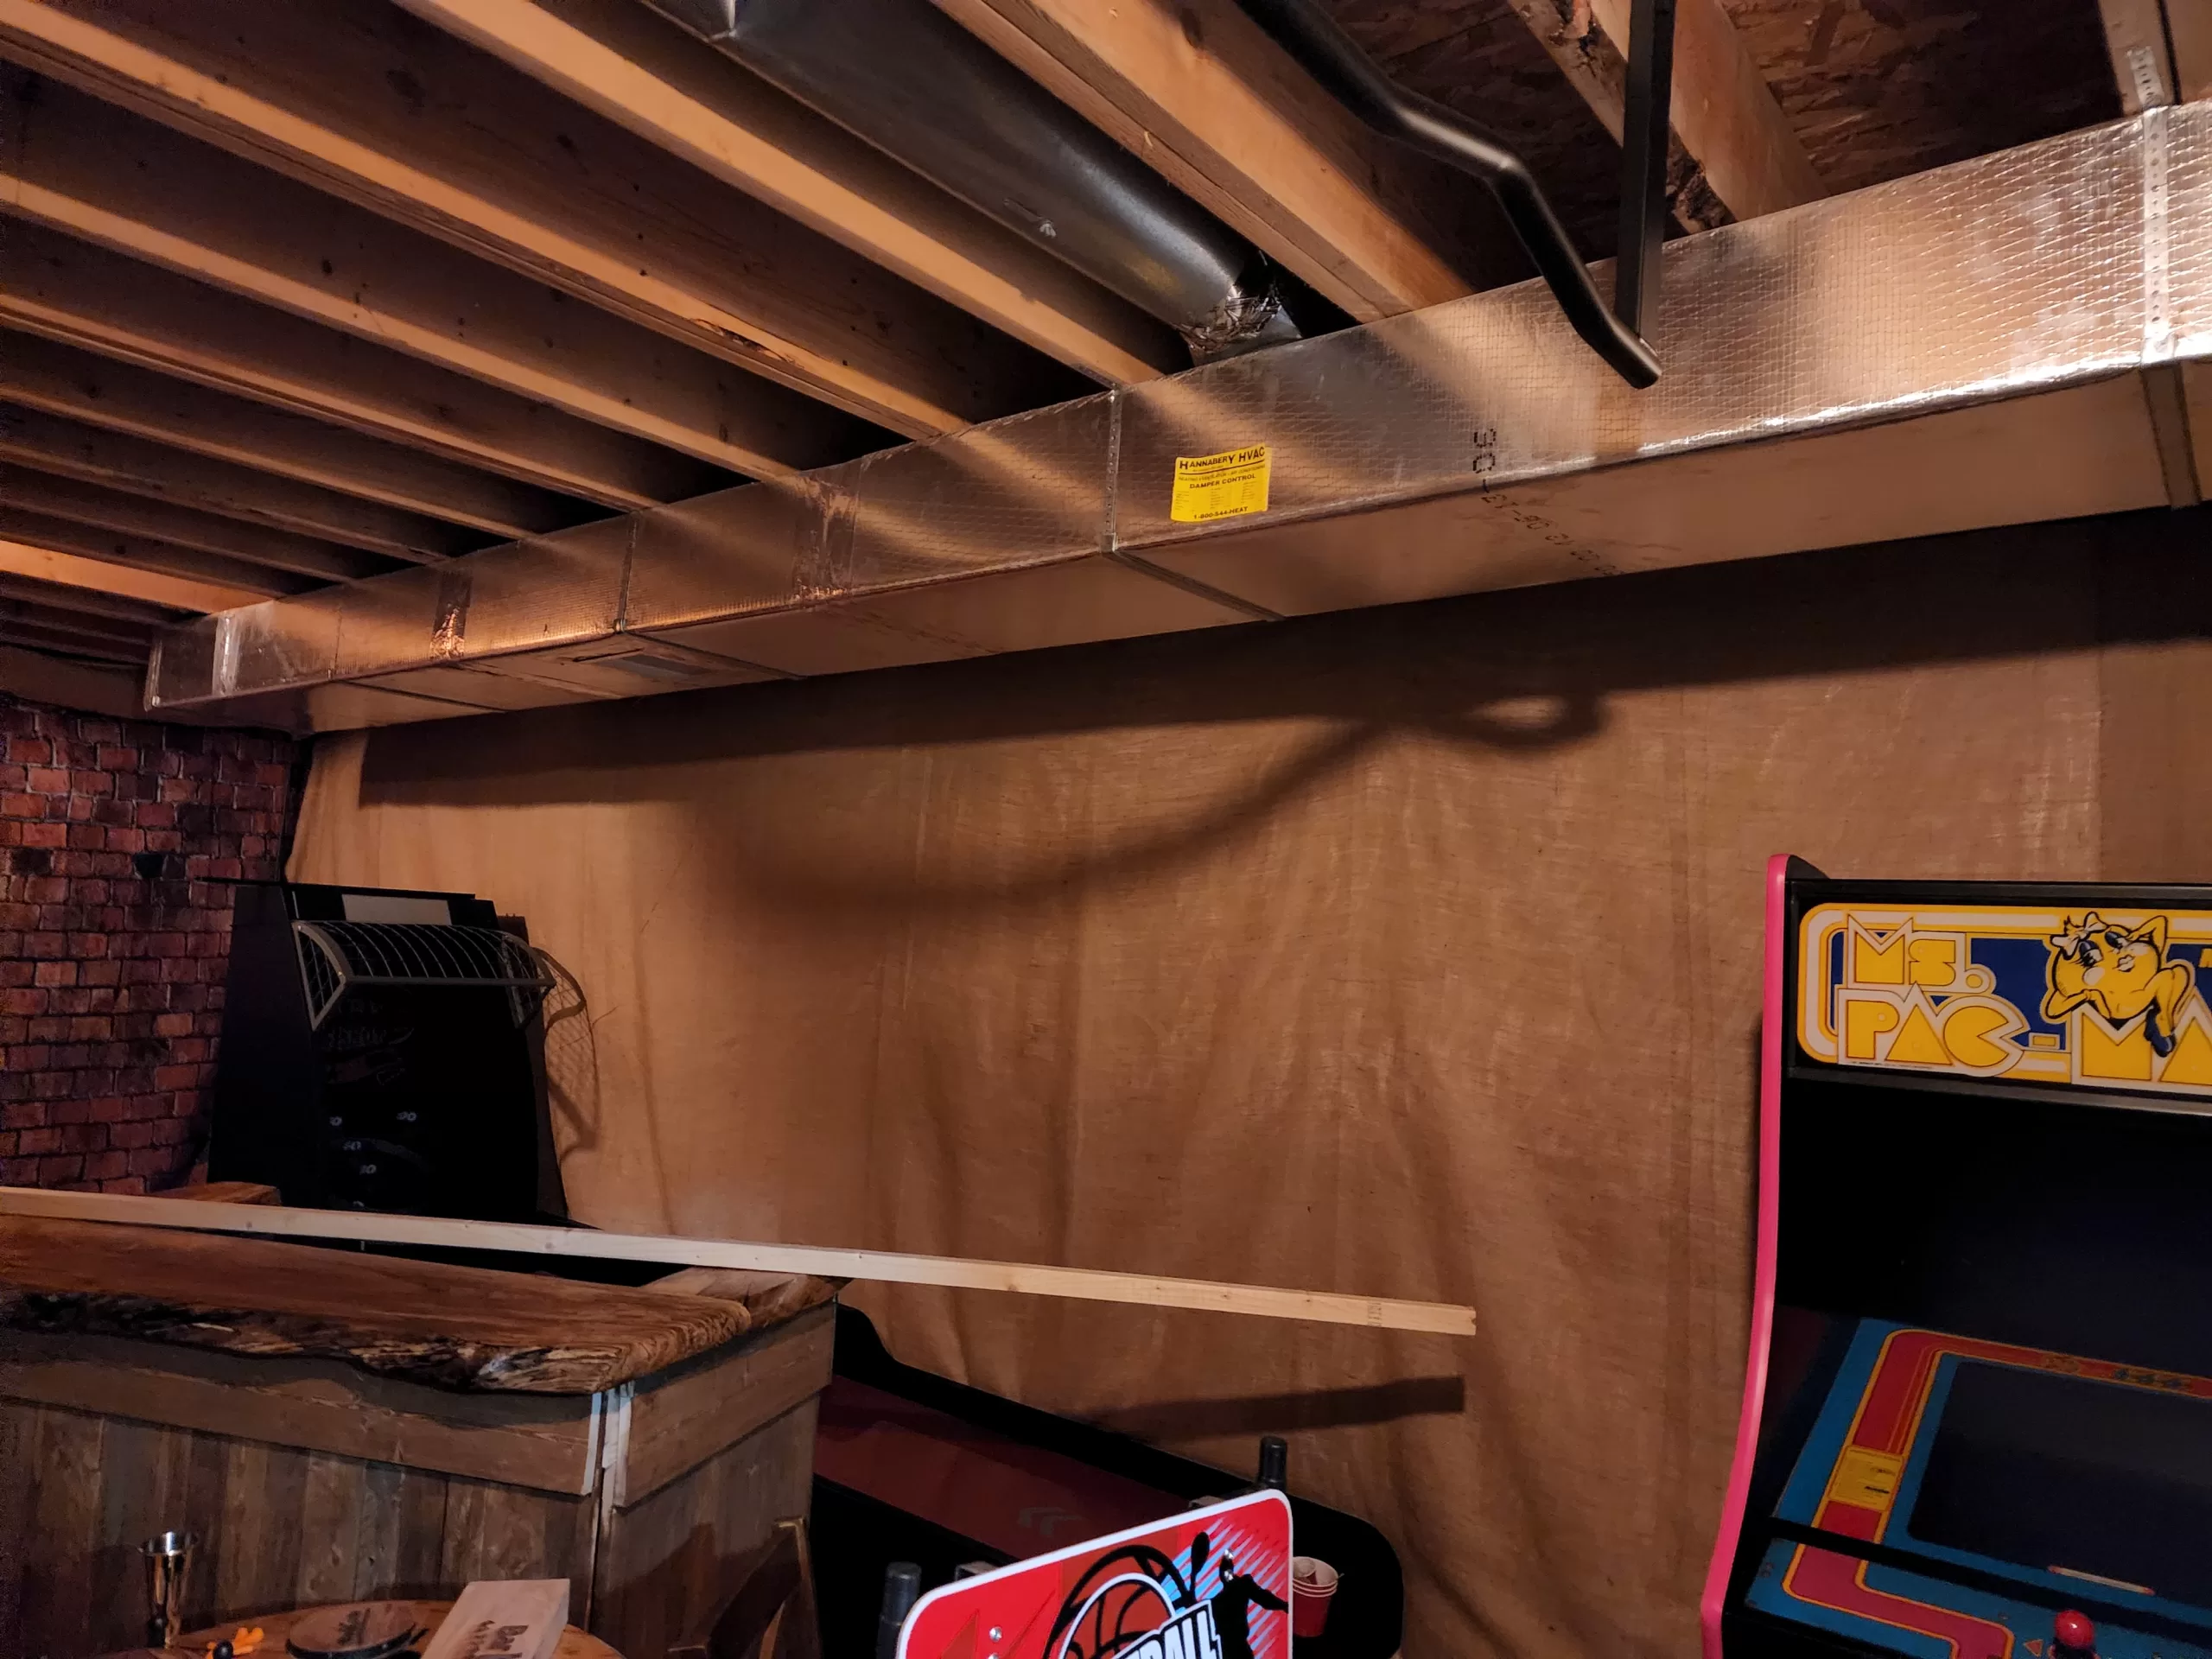
After

Weathered Wood Effect.
Build The frame
Measure the Distance and cut some wood
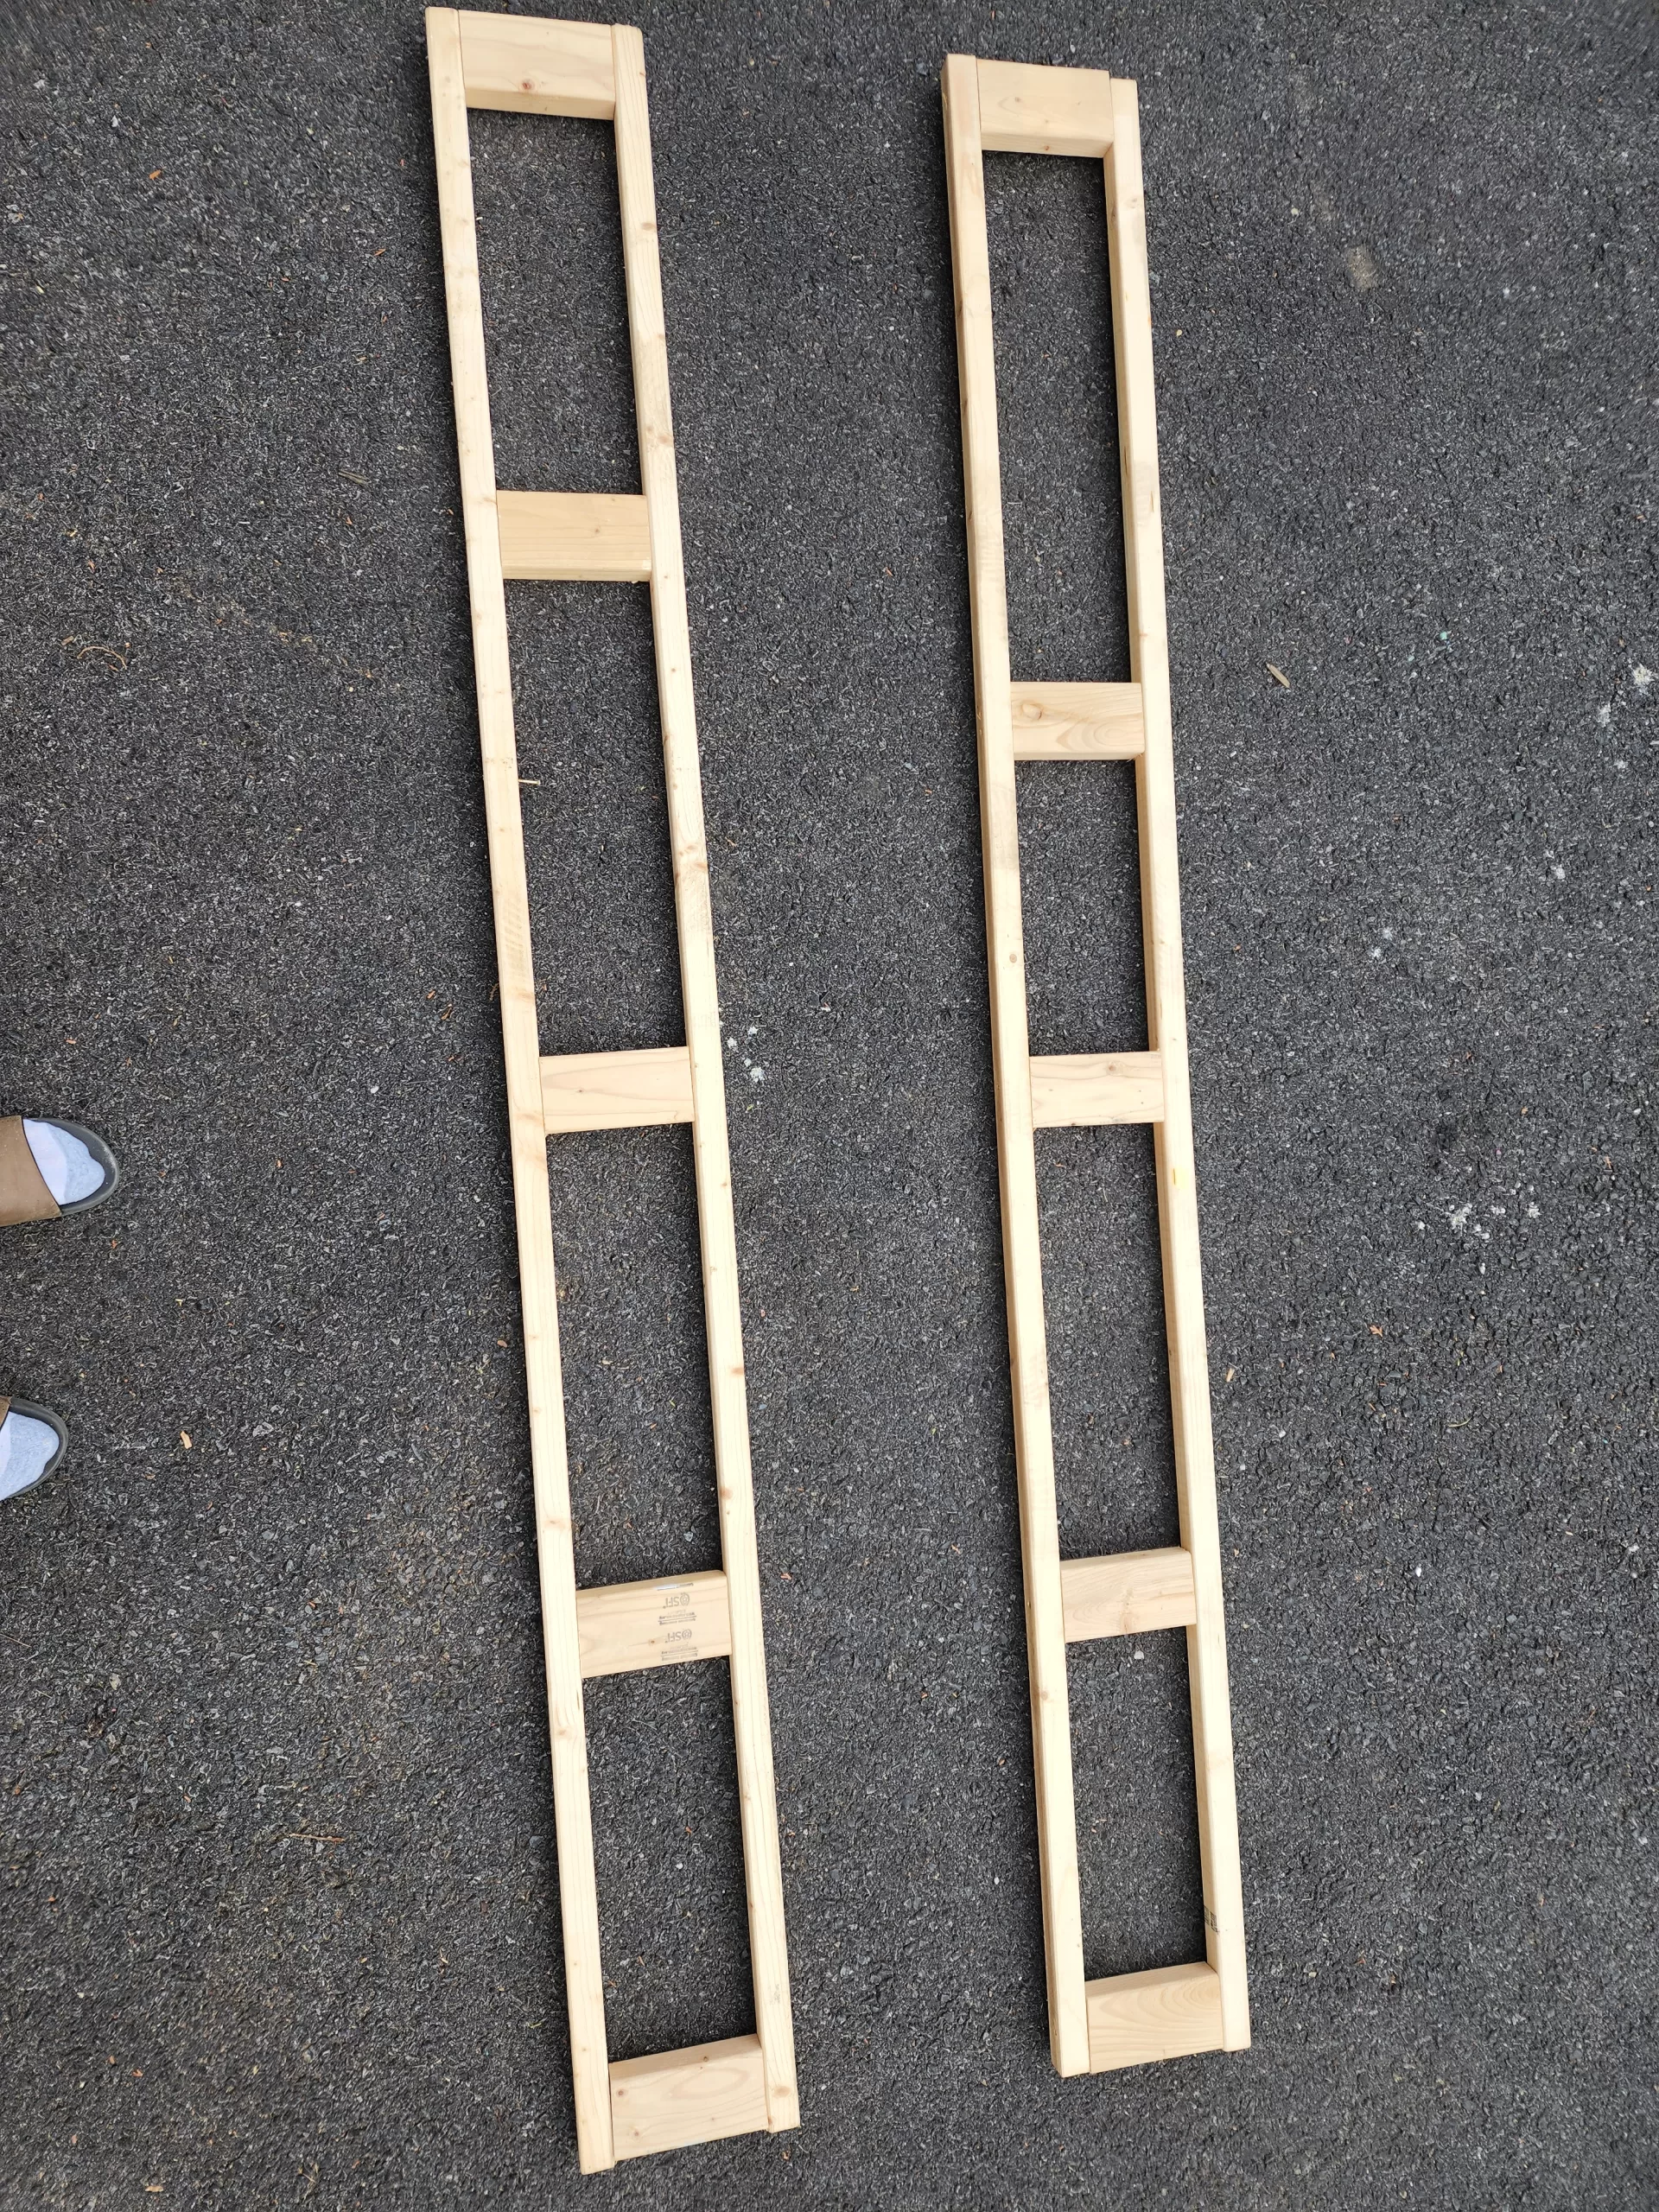
These frames are simpler then fillin’ a saucepan filled with sardines. See the steps below:
1. Measure the length and width of your AC duct.
2. Cut four (4) 2×2’s to match the length of your ductwork.
Note: If you have a long run of duct work, you can break these frames up into smaller sections to make it easier to install.
3. Cut 2×4’s to the width of your AC duct minus 4″
4. Screw the 2×4’s into the 2×2’s with wood screws. Space the 2×4’s every two to three feet (see below).
5. Line one of these frames up with your AC duct and make sure that they cover the full duct in both length and width.
You will need two identical frames if you plan to cover both sides. If you only need to cover one side then you can get away with framing out that side.
I only covered one side, but split my single frame into two pieces to make it easier to install.
Weathered Wood Effect.
Cut and attach “Weathered wood”
1×4 Weathered Wood
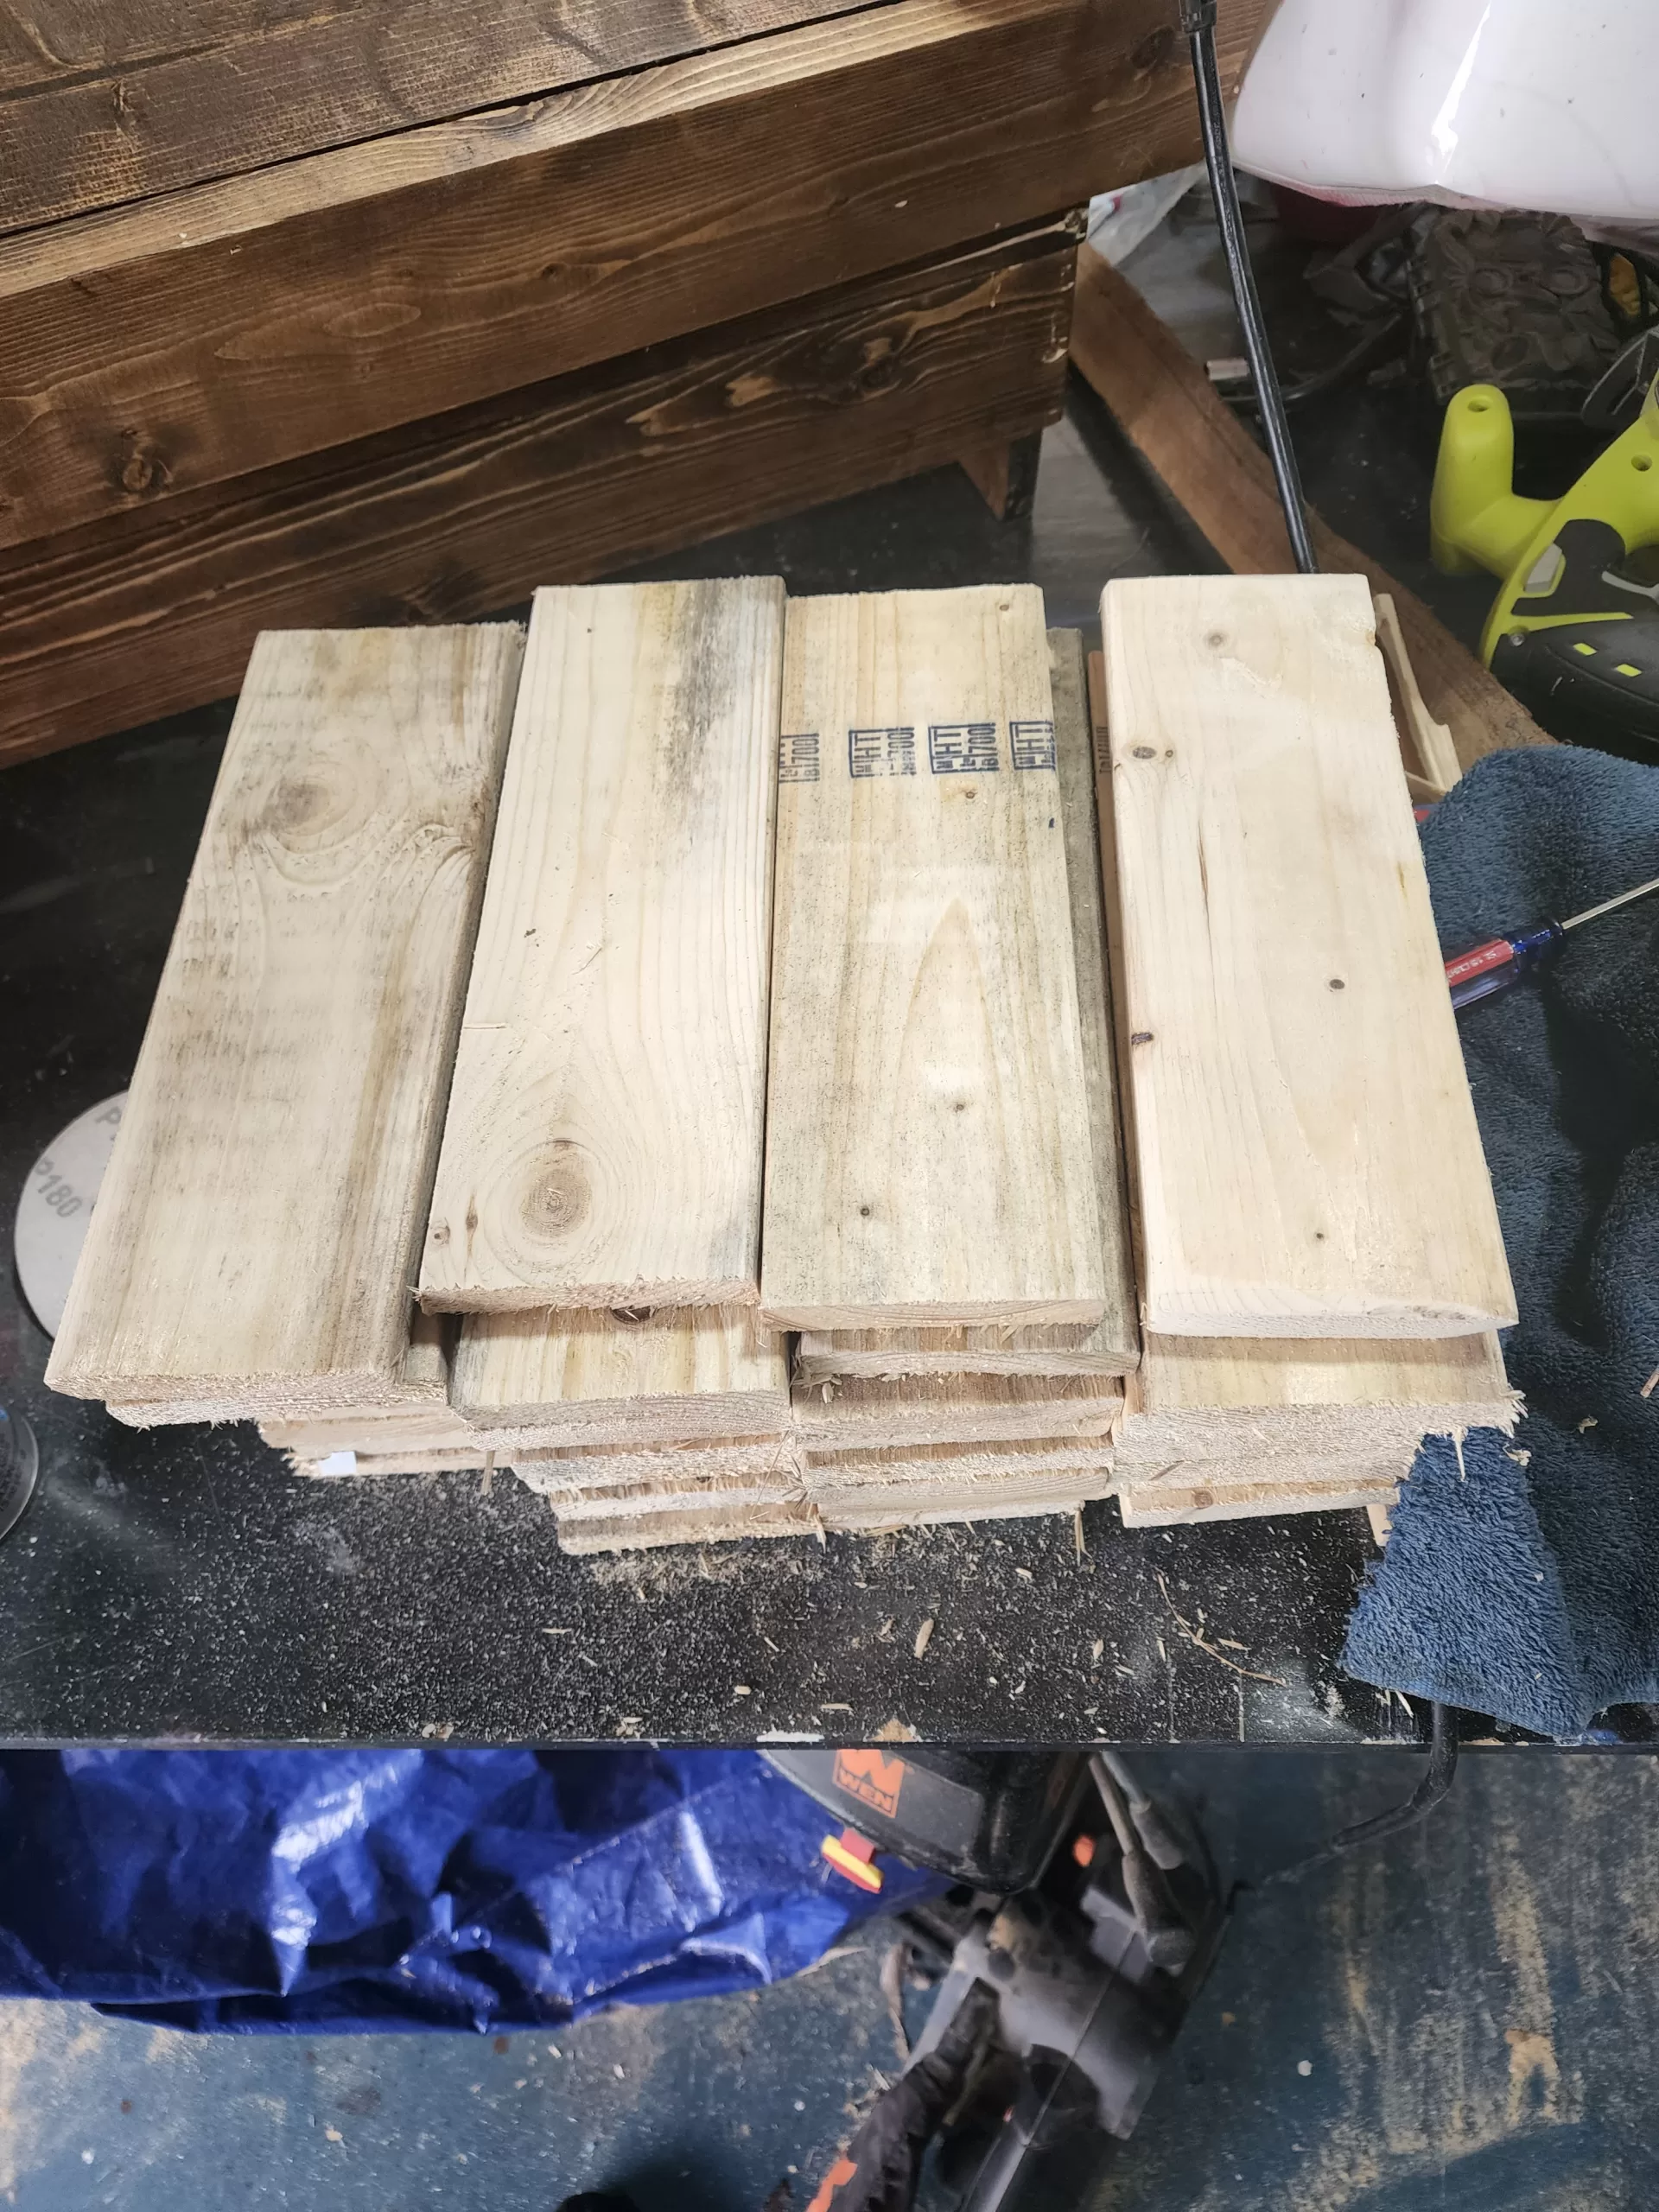
1×4 Pine is extremely cheap and easy to find. You can grab these from scrap pallets but an even easier solution is to check the purple cart at home depot. The purple cart is filled with wood that is marked down by 70%. Often, cashiers will just give you the beat up pieces for free. We are cutting the wood into small sections and so the damaged pieces can just be discarded. We grabbed a stack of damaged wood for under $10.

You want to cut the 1×4’s at least 1/8″ longer than the width of your frame. This is because we will attached a 1/8th plywood later, I would be generous with that measurement.
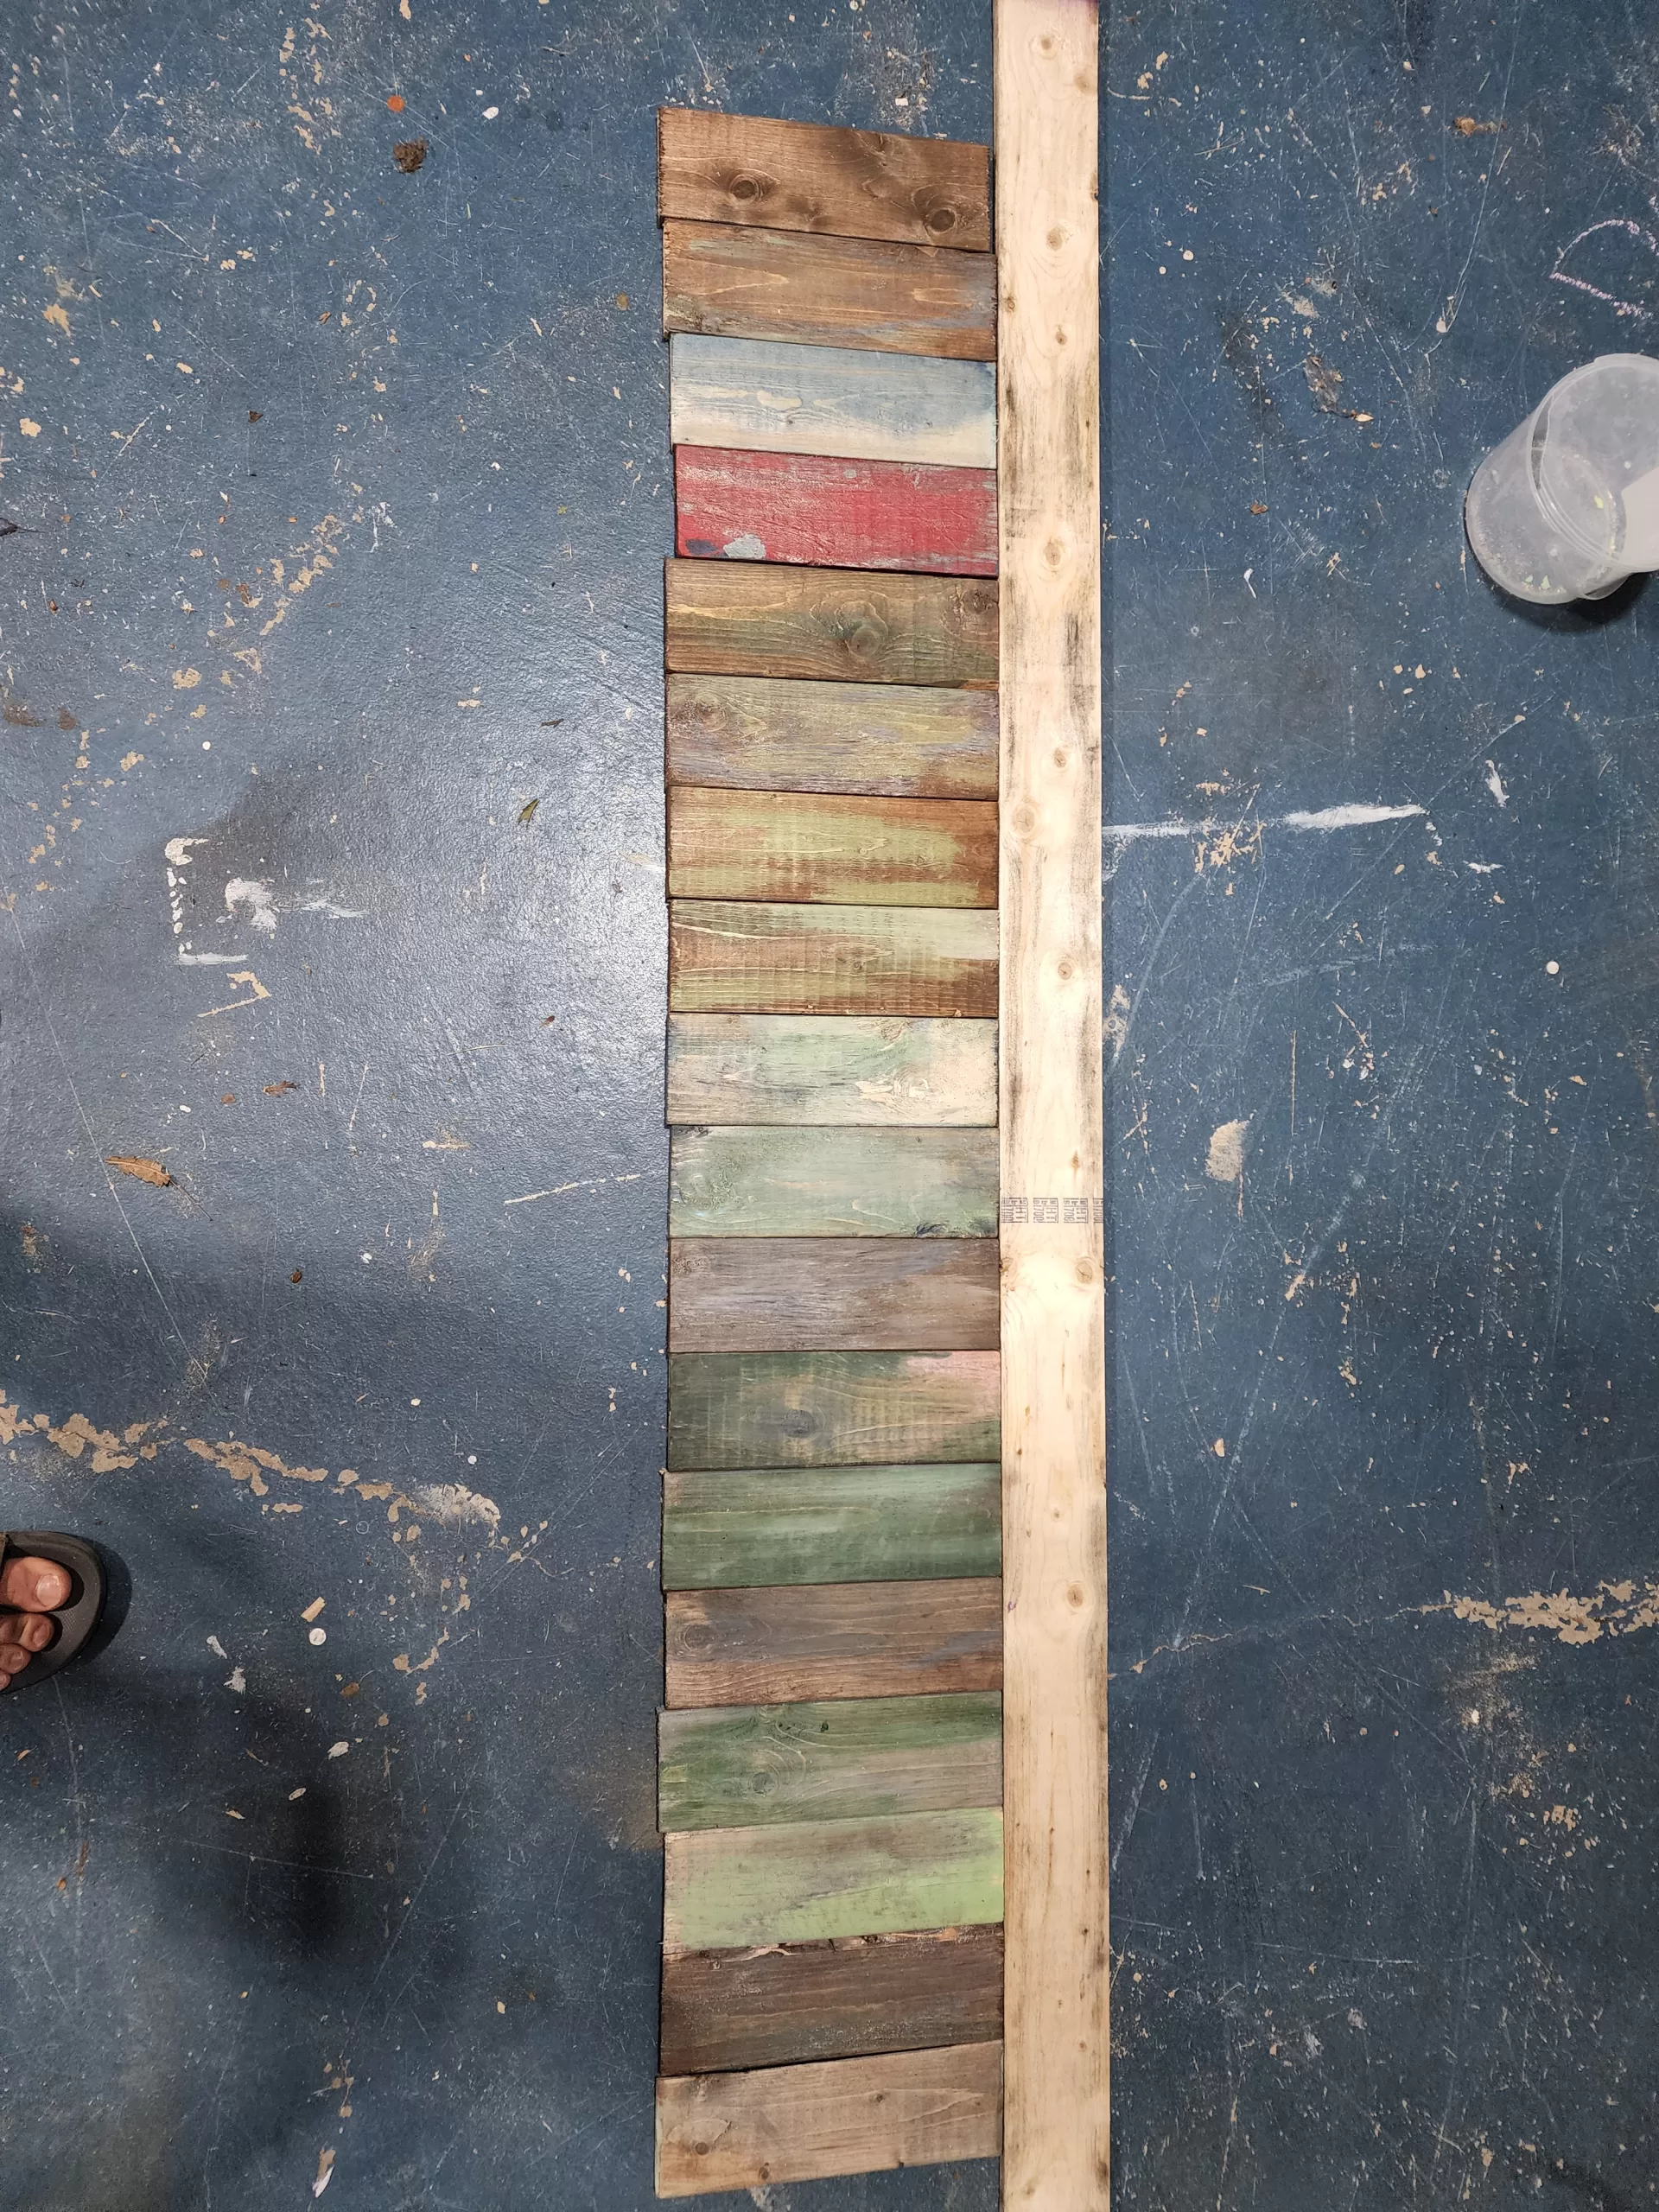
Using the weathering wood technique, paint the wood and then lay out your design.
Weathered Wood Effect.
Hang and Nail
Let’s hang this wood
Hanging the frame is simple for exposed floor joists. If you are hanging this in an area with drywall then use your stud finder to mark spots where there are floor joists/studs.
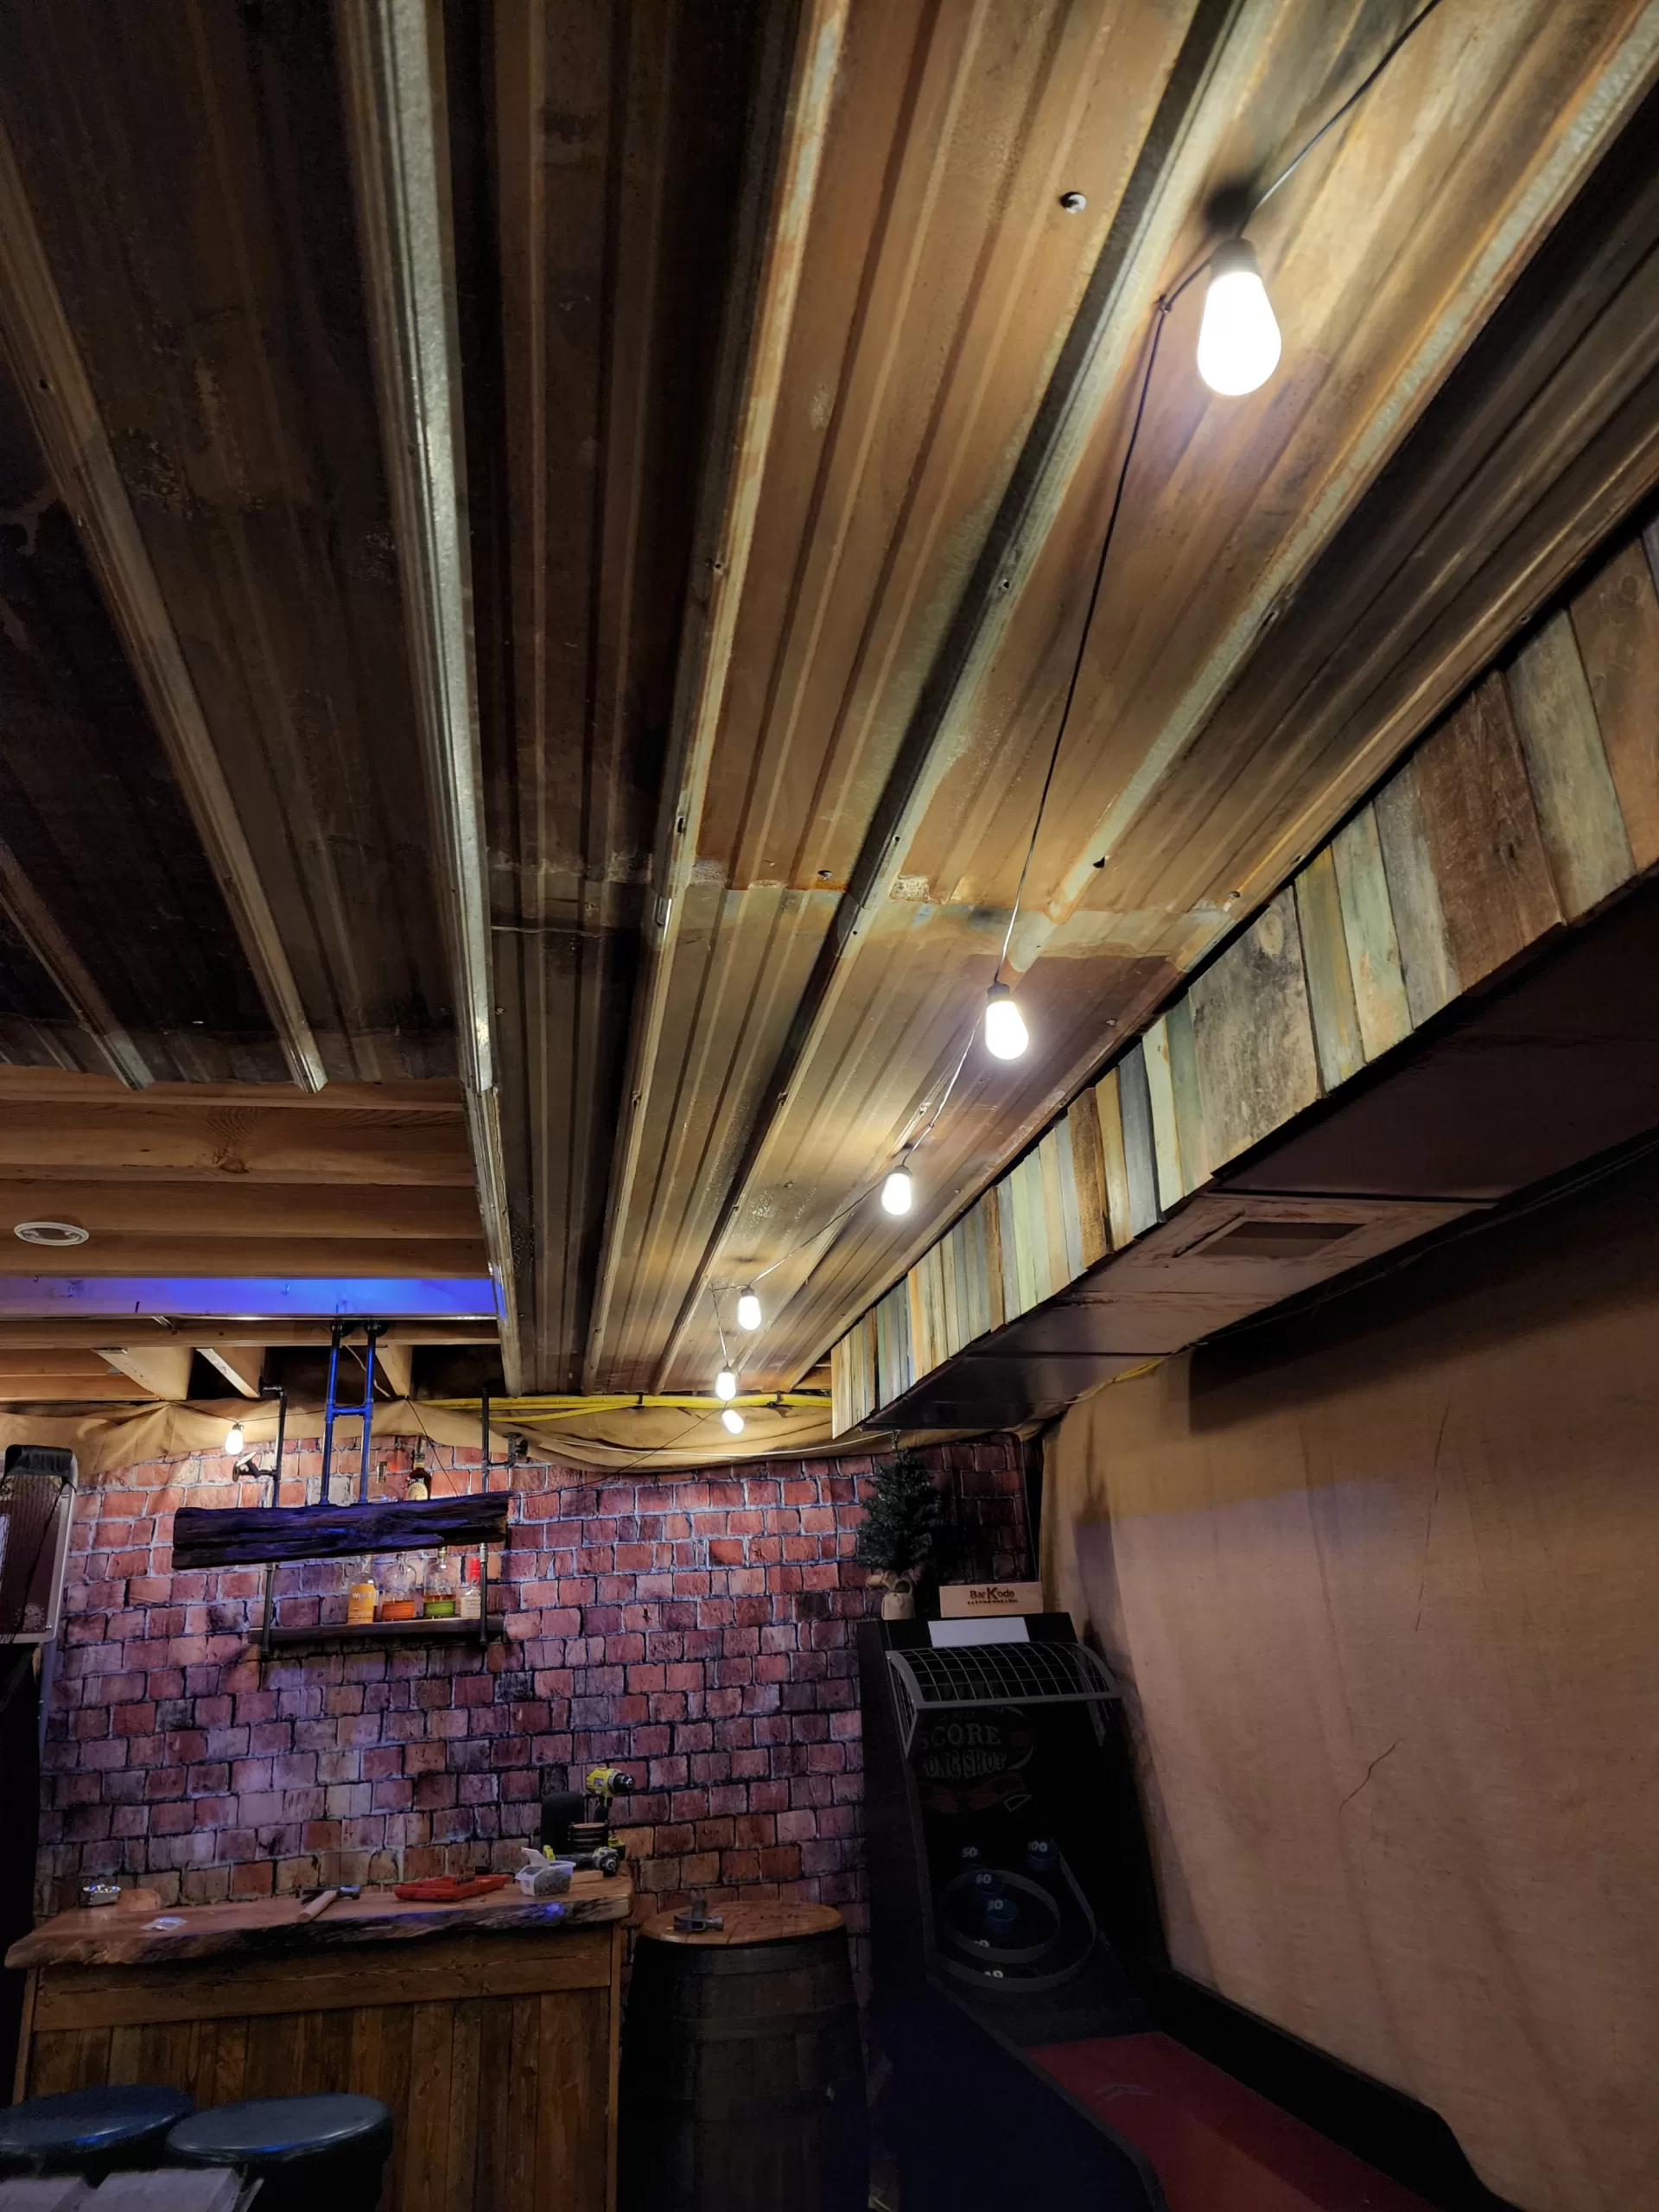
Using wood screws, screw through your 2×2 frame and into the floor joists or studs. I did this every 5 feet. Once the frame is secure, use a hammer and nails or a nail gun to tack up the 1×4 pine to the frame.
I had pre-laid out the pattern that I wanted, then had the kids hand me the boards while I nailed them up. Put one nail in the top and one in the bottom of every board. Make sure that the nails aren’t long enough to go through the ductwork.
All Hung!
Weathered Wood Effect.
Install the bottom
Put your wood weathering technique to the test
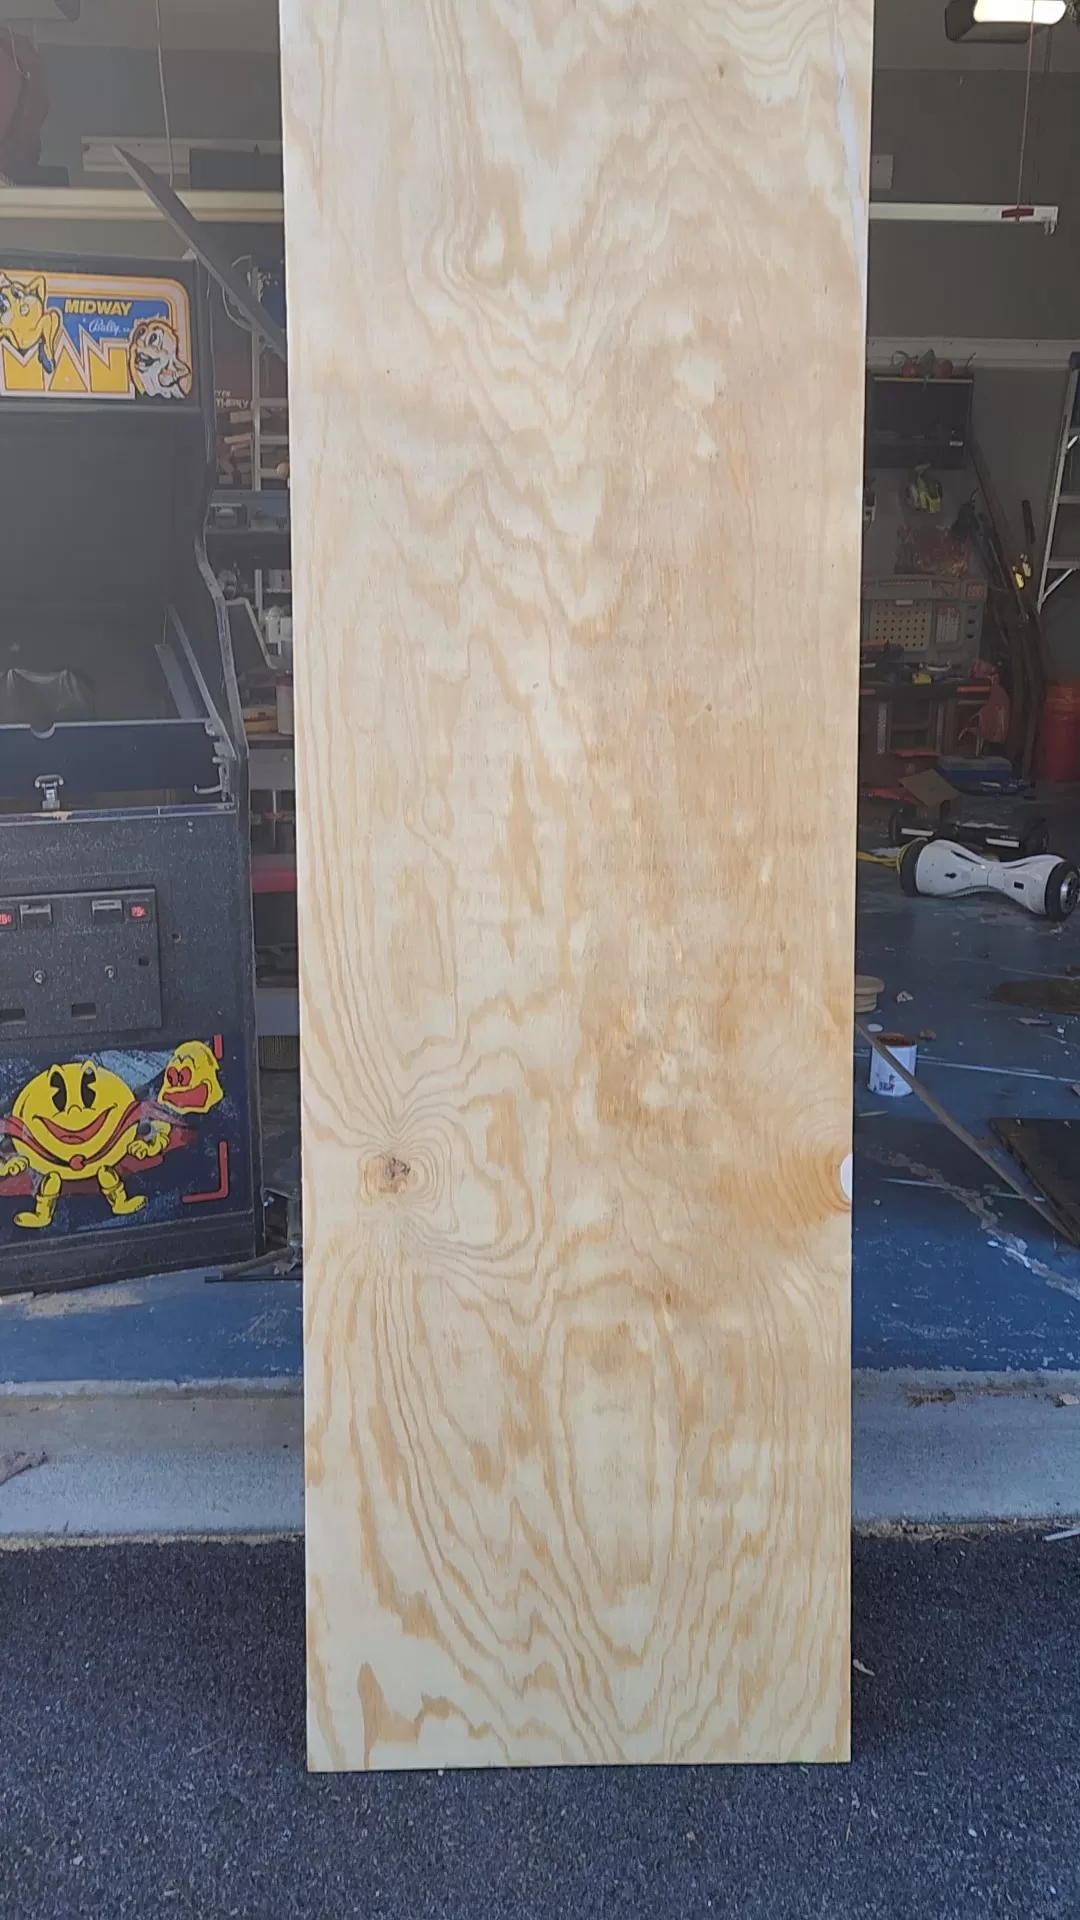
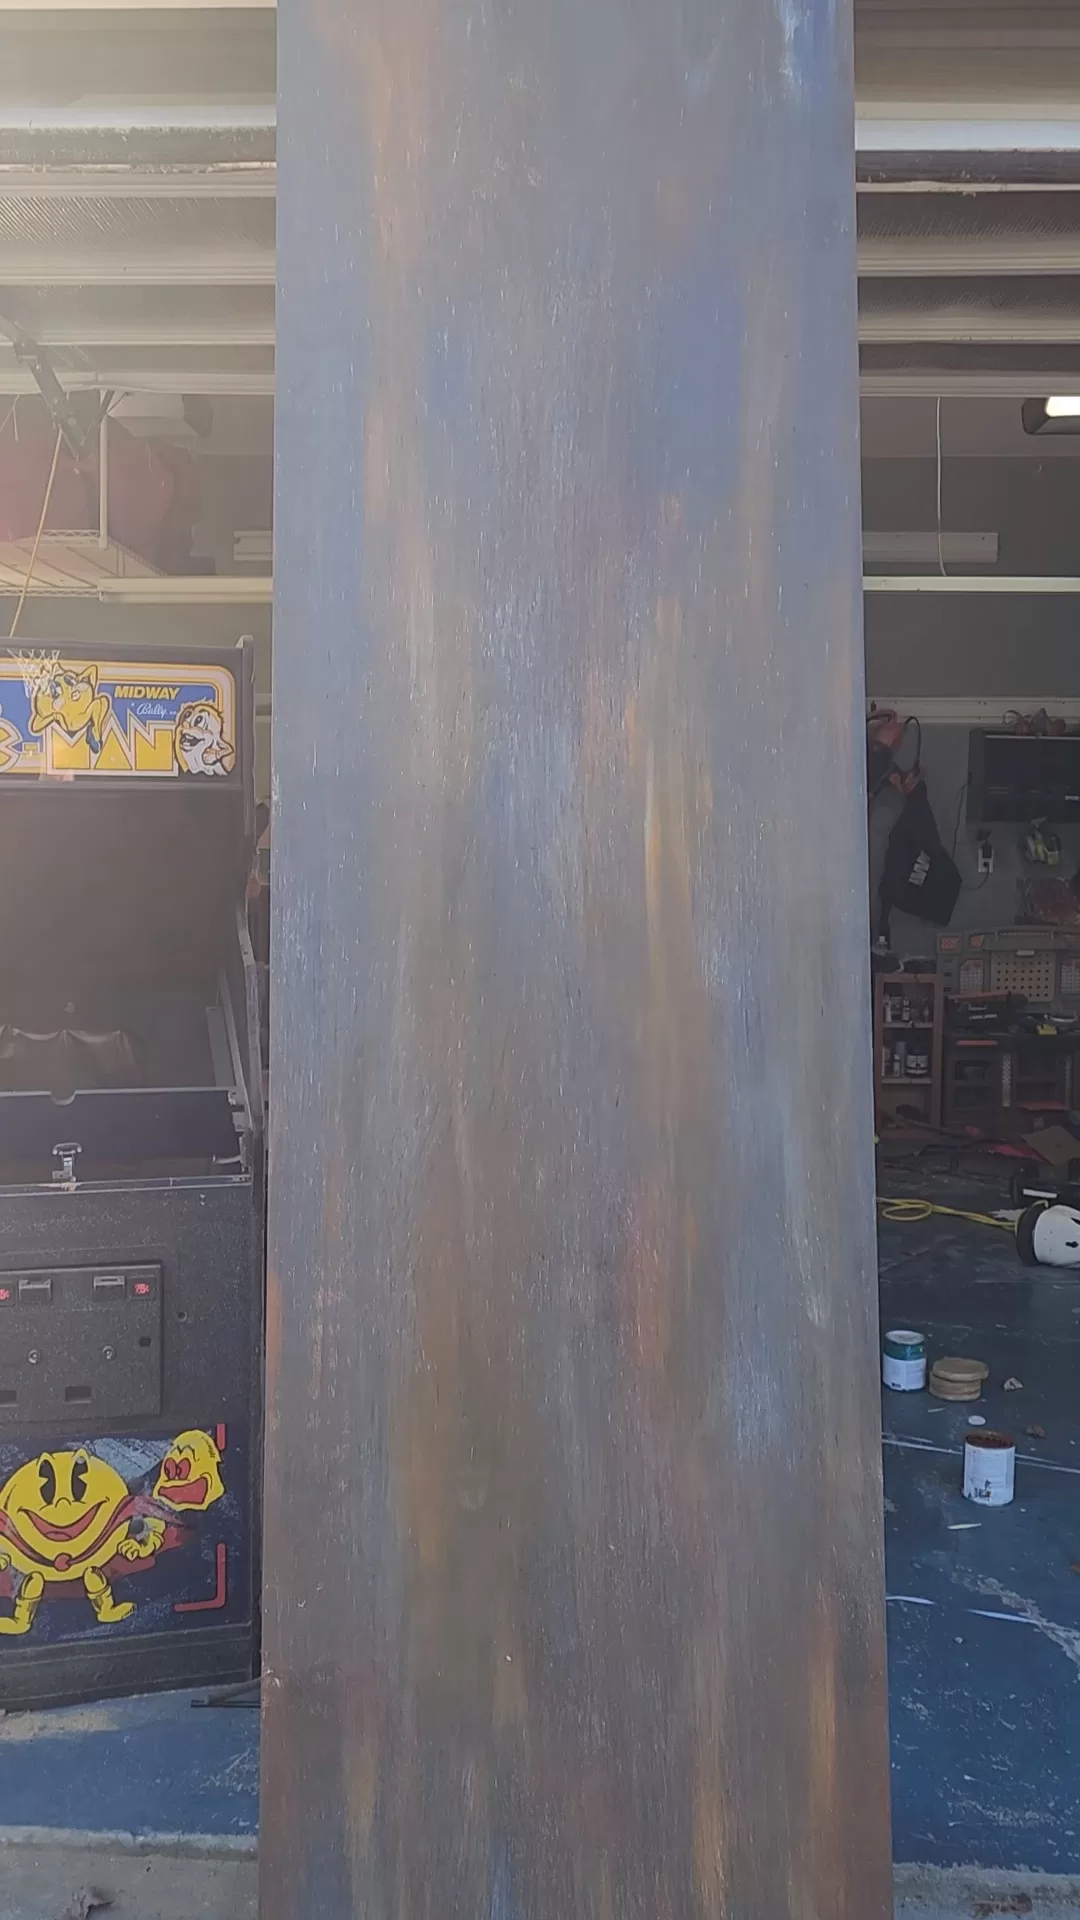
For simplicity, I used 1/8th inch plywood cut in half (two 2′ sections). Below is a before and after using the weathering technique. I used wood screws and screwed the plywood into the bottoms of the 2×2 frame. Space the screws 4-5 feet apart.
If you didn’t frame out one side of the AC duct, then simply create a mini frame using 2x2s and 2×4’s every 4-5 feet and drill directly into that.
Next Up.
Bar Arcade Speakeasy
Click Below to access my free series on how we converted an unfinished portion of our basement into a speakeasy bar arcade. All for less than the cost of what a contractor was going to charge to put up the studs!
Next Up: Rustic Wall
Click the picture above to learn how we built this beauty of a wall in an hour, for $20.

The skill to draw photo-realistic images of peoples faces, cars and objects is not one that I may ever have. My handwriting looks like kitten-scratch, but I absolutely love chaotic art. Weathering wood doesn’t take any particular skill but it is incredibly fun trying to layer different kind of paint in a way that looks natural in the end. It’s the kind of art that you feel crazy doing but the end result can be mesmerizing.
I hope you all create some beautiful things with this tutorial. Please feel free to share some finished pictures with us – TheCraftyCatsman@gmail.com

